How to Get the Most Out of a Model Photoshoot: My Workflow + Tips
I believe a productive shoot isn’t about rigid planning , it’s about some basic preparation, trust and knowing when to seize the moment.
This post walks you through my workflow when shooting with a model, based on a half-day studio session with London-based model Saida. The images below are just some of what we created together. I put this post together as I often get asked how I shoot and the honest answer is I have a few simple rules and let my instinct fill in the gaps. Read on to see those steps and how Saida and I made the images below.
In this post I take you through a real studio shoot from start to finish, not just the images, but the thinking behind them. From preparation and trust to light, teamwork, and reacting to those sponteanouse moments. These are the steps that shaped some of the images above. See the full set of images here.
#1 Get to know the model
First impressions count. When I arrange a photoshoot with a model, especially someone I have not worked with before, I always review their portfolio first and try to get a sense of who they are from the photos they choose to publish of themselves. I want to make sure our styles are compatible and build a mental image of the kind of photos we could take together. I’ll talk about photos in their portfolio that I like and we can start to swap ideas.
I share links to my website for relevant looks, or models that they may know. I always suggest they ask other modes I have worked with for feedback on me. It’s important to start building trust early.
Food is a must on a shoot, I don’t want people to run out of energy. That means asking if they are vegetarian or have any allergies.
This shoot itself had come together unexpectedly. I was originally meant to be working with Emily Massey, but she had to pull out and recommended Saida instead. Two days earlier I didn’t even know we’d be shooting together. And yet, it worked out rather well I think.
Takeaway: It’s often easy to forget that the person at the other end of those DM’s is trying to figure out if they want to shoot with me or not and I do my best to put them at ease by chatting and being honest.
#2 Have a Plan. But Don’t Be Afraid to Deviate.
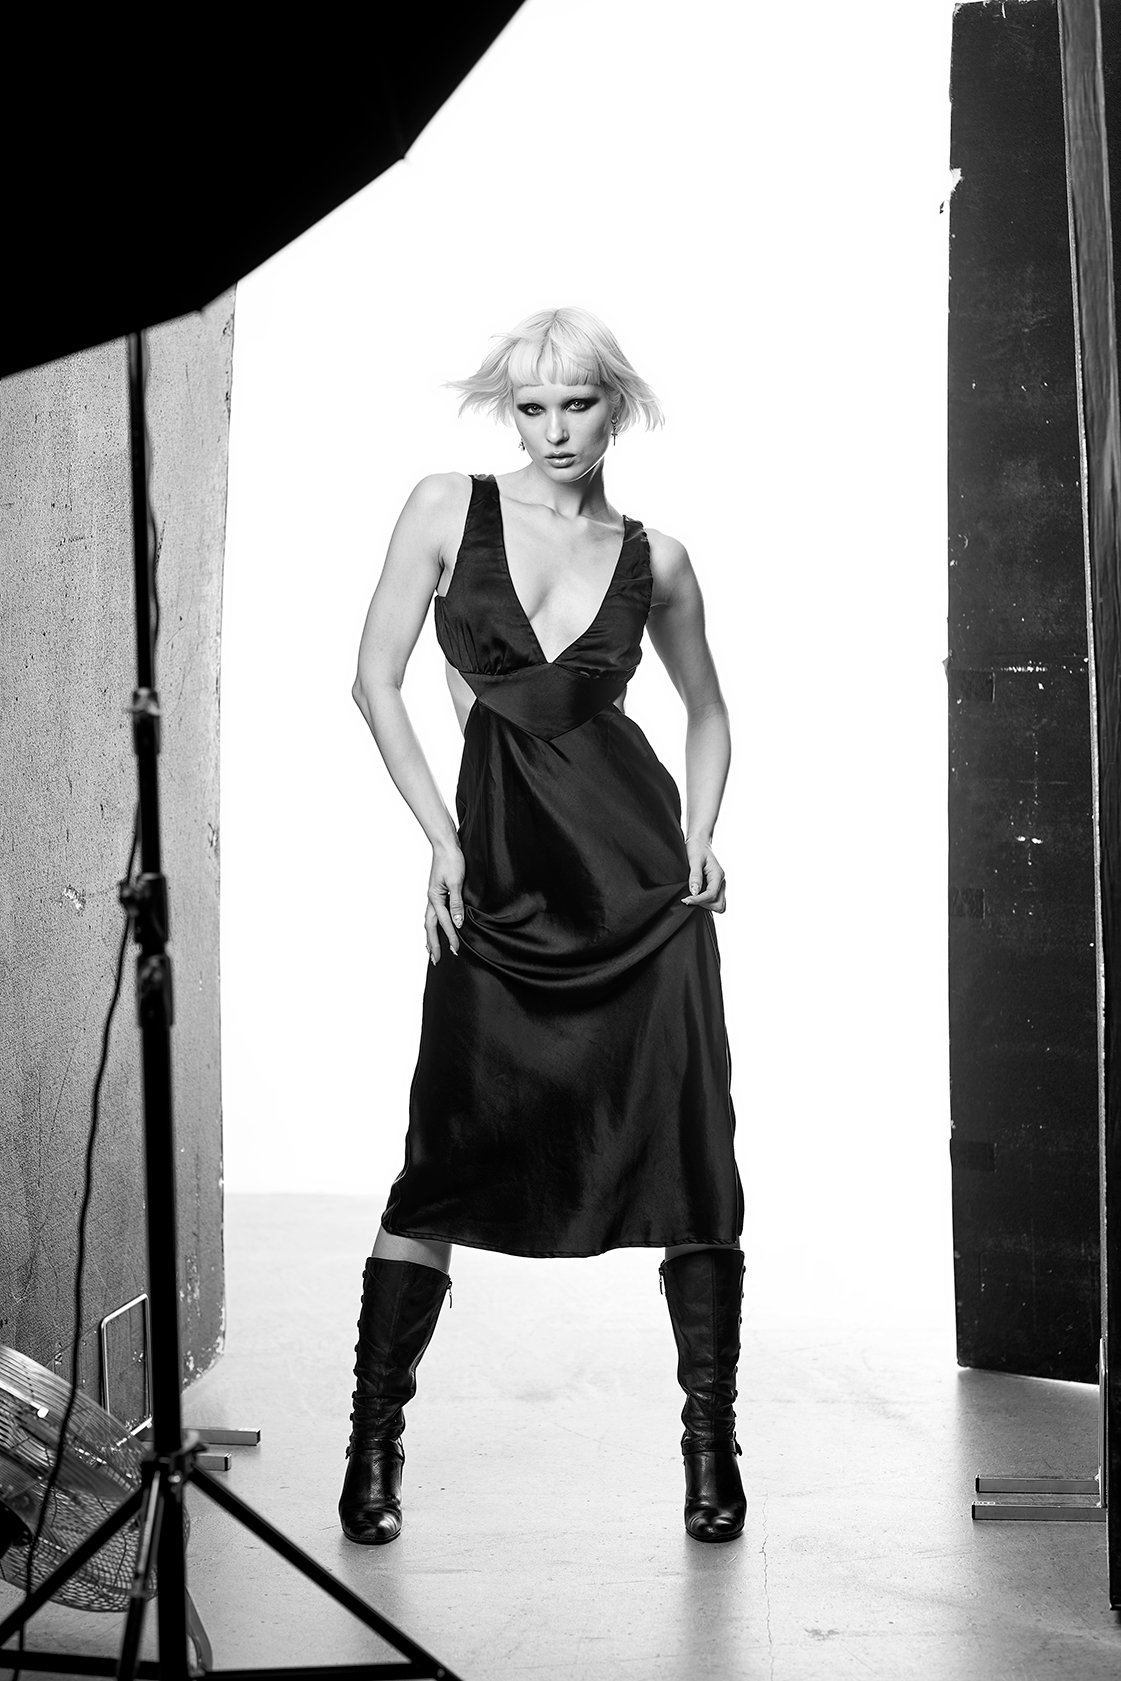
I always have a plan, a set of looks I want to achieve, backgrounds I want to use, I often share a pinterest board or a handful of inspo images so the model can bring suitable outfits. But I treat this as a guide, not a blueprint. I favour the spontaneity of a shoot and like to let the light on the day shape how we shoot. This image is from our first set and is a great example.
Saida had barely walked into the studio when I had to politely skip the pleasantries and ask her to jump straight into it. The winter sun behind me wasn’t going to last long. She was still in the outfit she’d travelled in, but it worked and within minutes she was standing in that hard morning light.
The winter light was brutal. It sliced through the metal window frames in long, graphic lines. Sometimes it was almost too bright to see. Saida and I walked around the back of the studio chasing the light. I love working with daylight and seeing what we can do with it.
Yes, I always have a loose plan, outfits, ideas, mood. But on the day, the light and the moment take priority. Ultimately if you are taking photos of a person a rigid plan is unlikely to captivate them properly. So I enjoy a more collaborative approach to a shoot, let the model shine.
Takeaway: Have a framework for your shoot. But stay flexible enough to let the light and the moment change it.
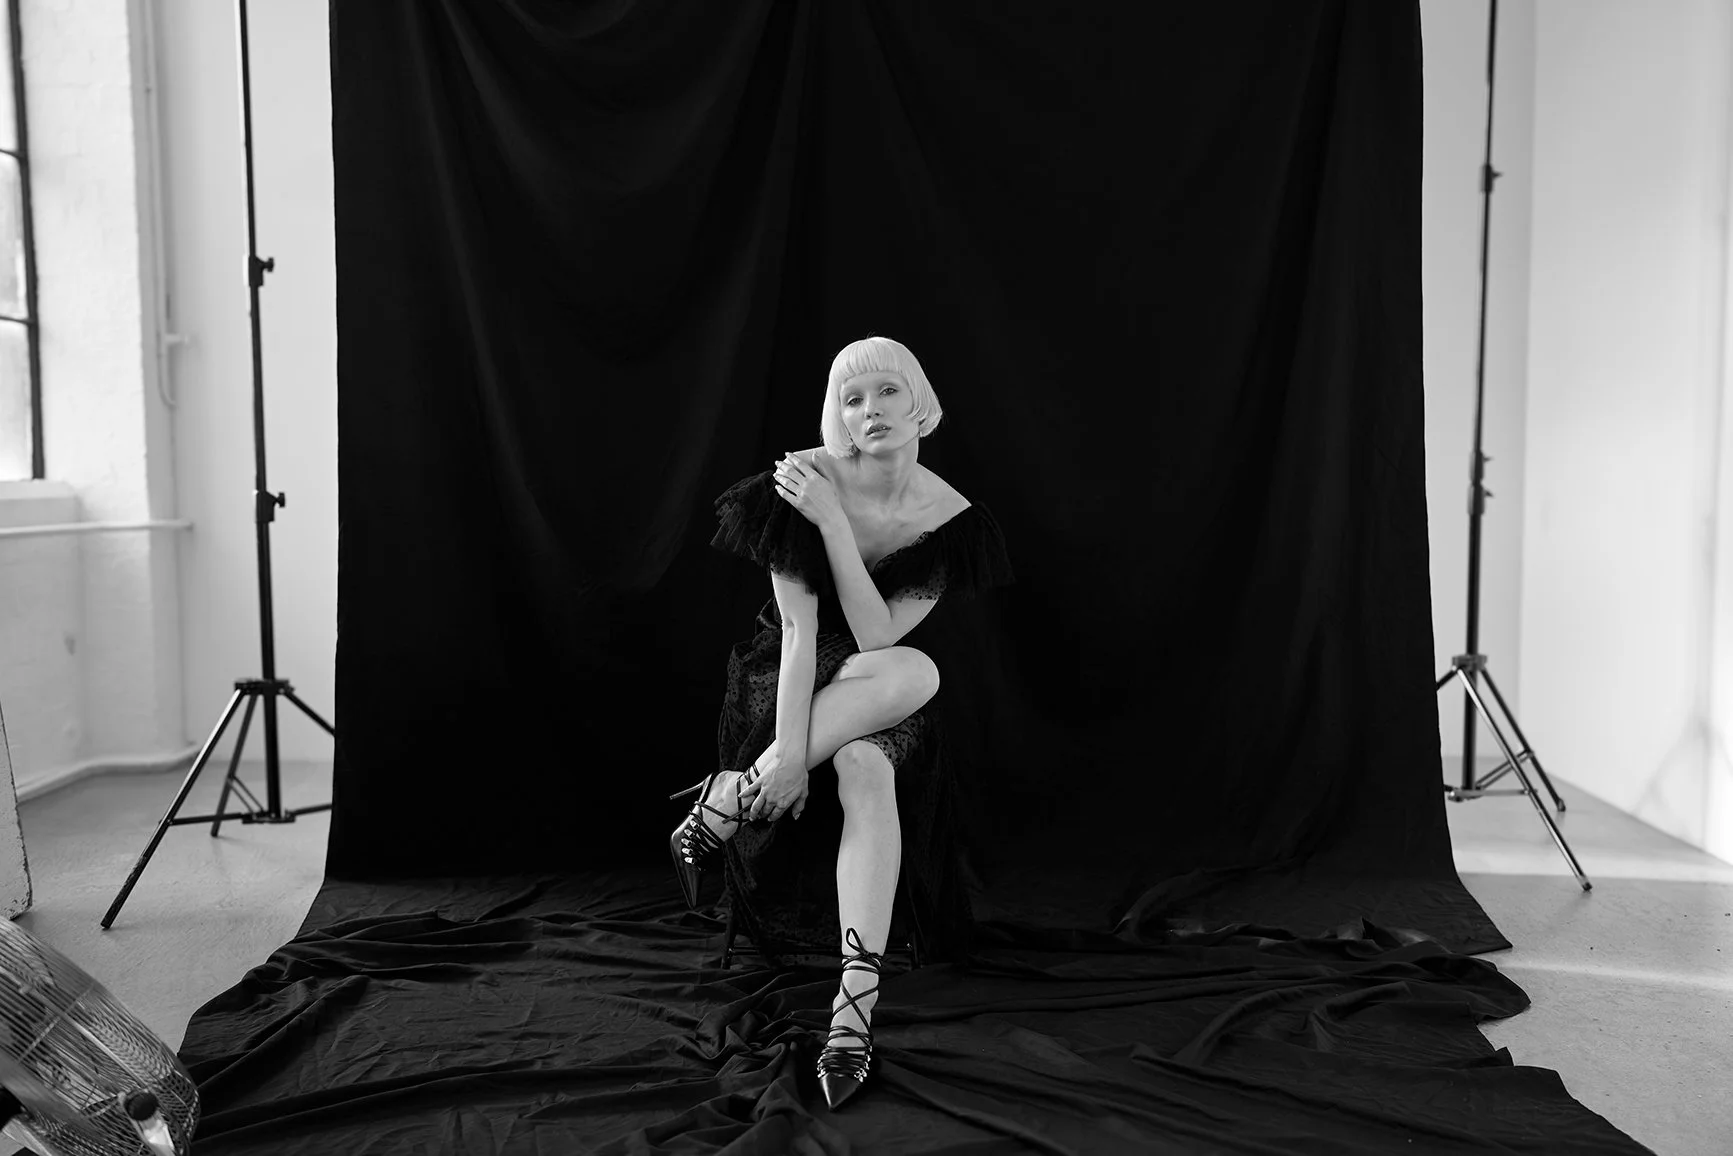
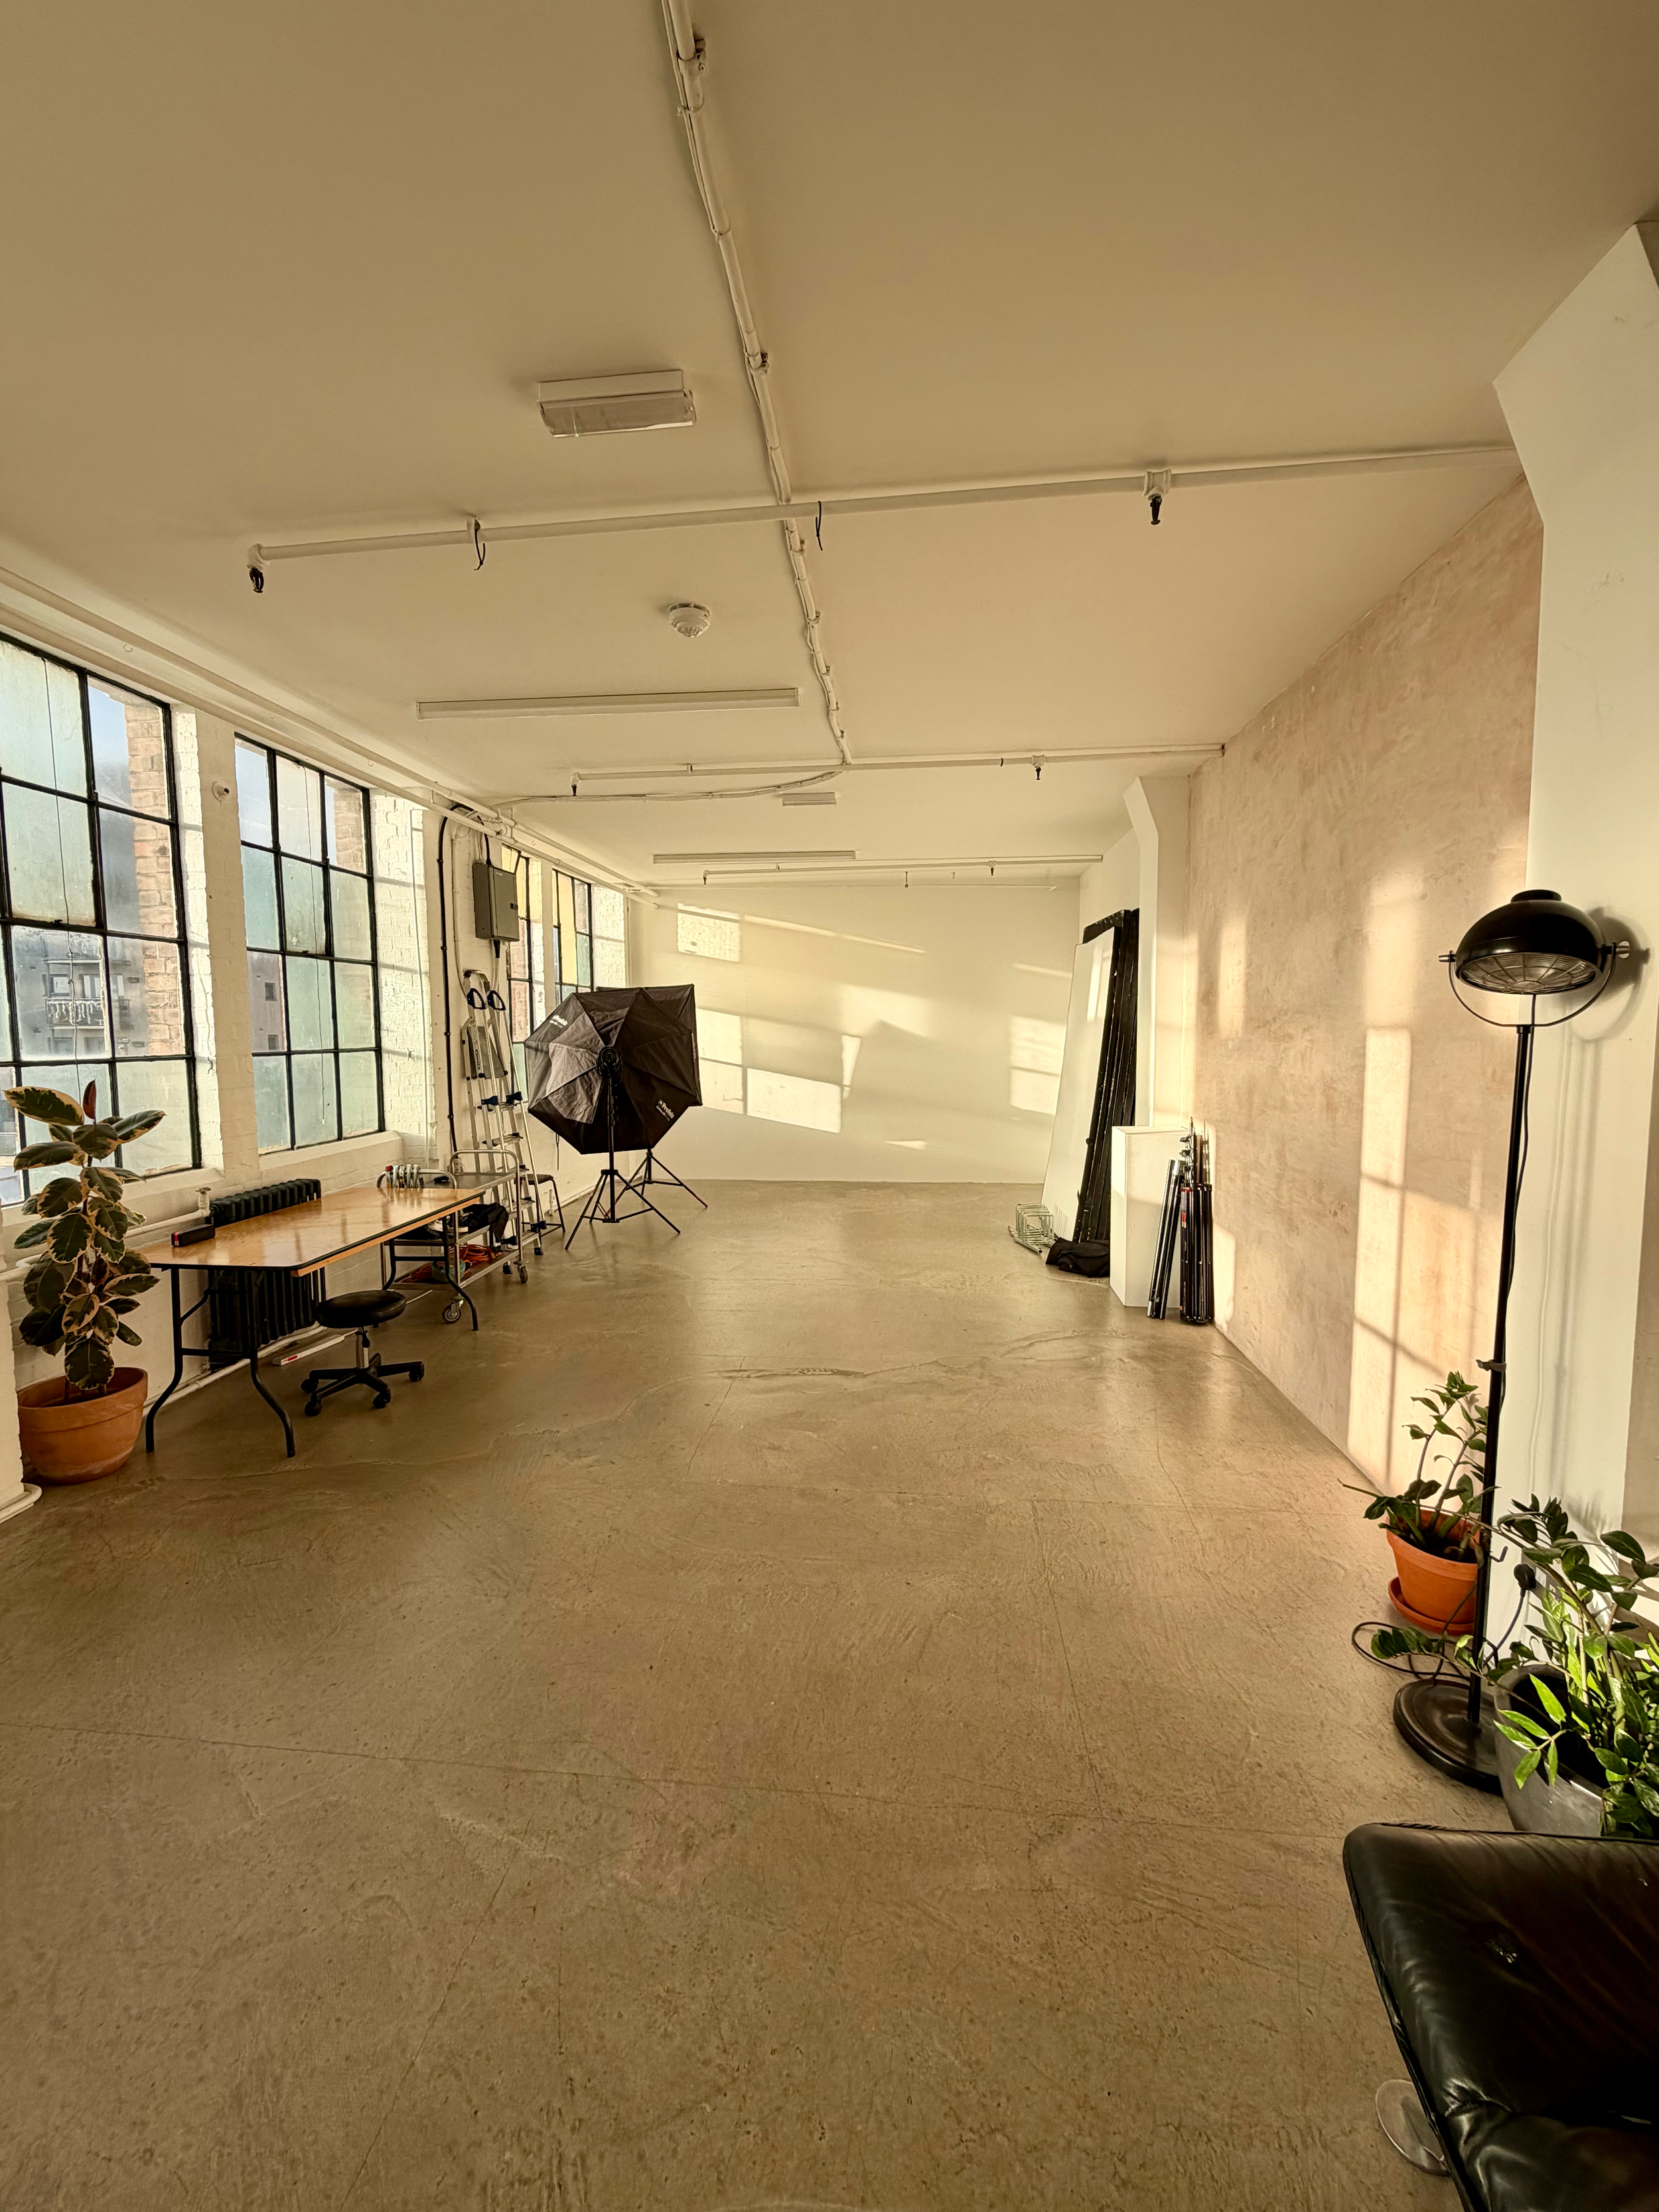
I love to bring the full context of the studio into the images. A photo of the studio set, but one where it might be credible in its own right. Other than the B&W conversion, this is straight from camera.
#3 Building on the portfolio
Shoots like these are for me, a time to exercise my creative muscle and build upon my portfolio. A model friend, Daria, once pointed out that I tend to stick to three genres, portraits, fashion and art nude in wild landscapes. In truth she had me there.
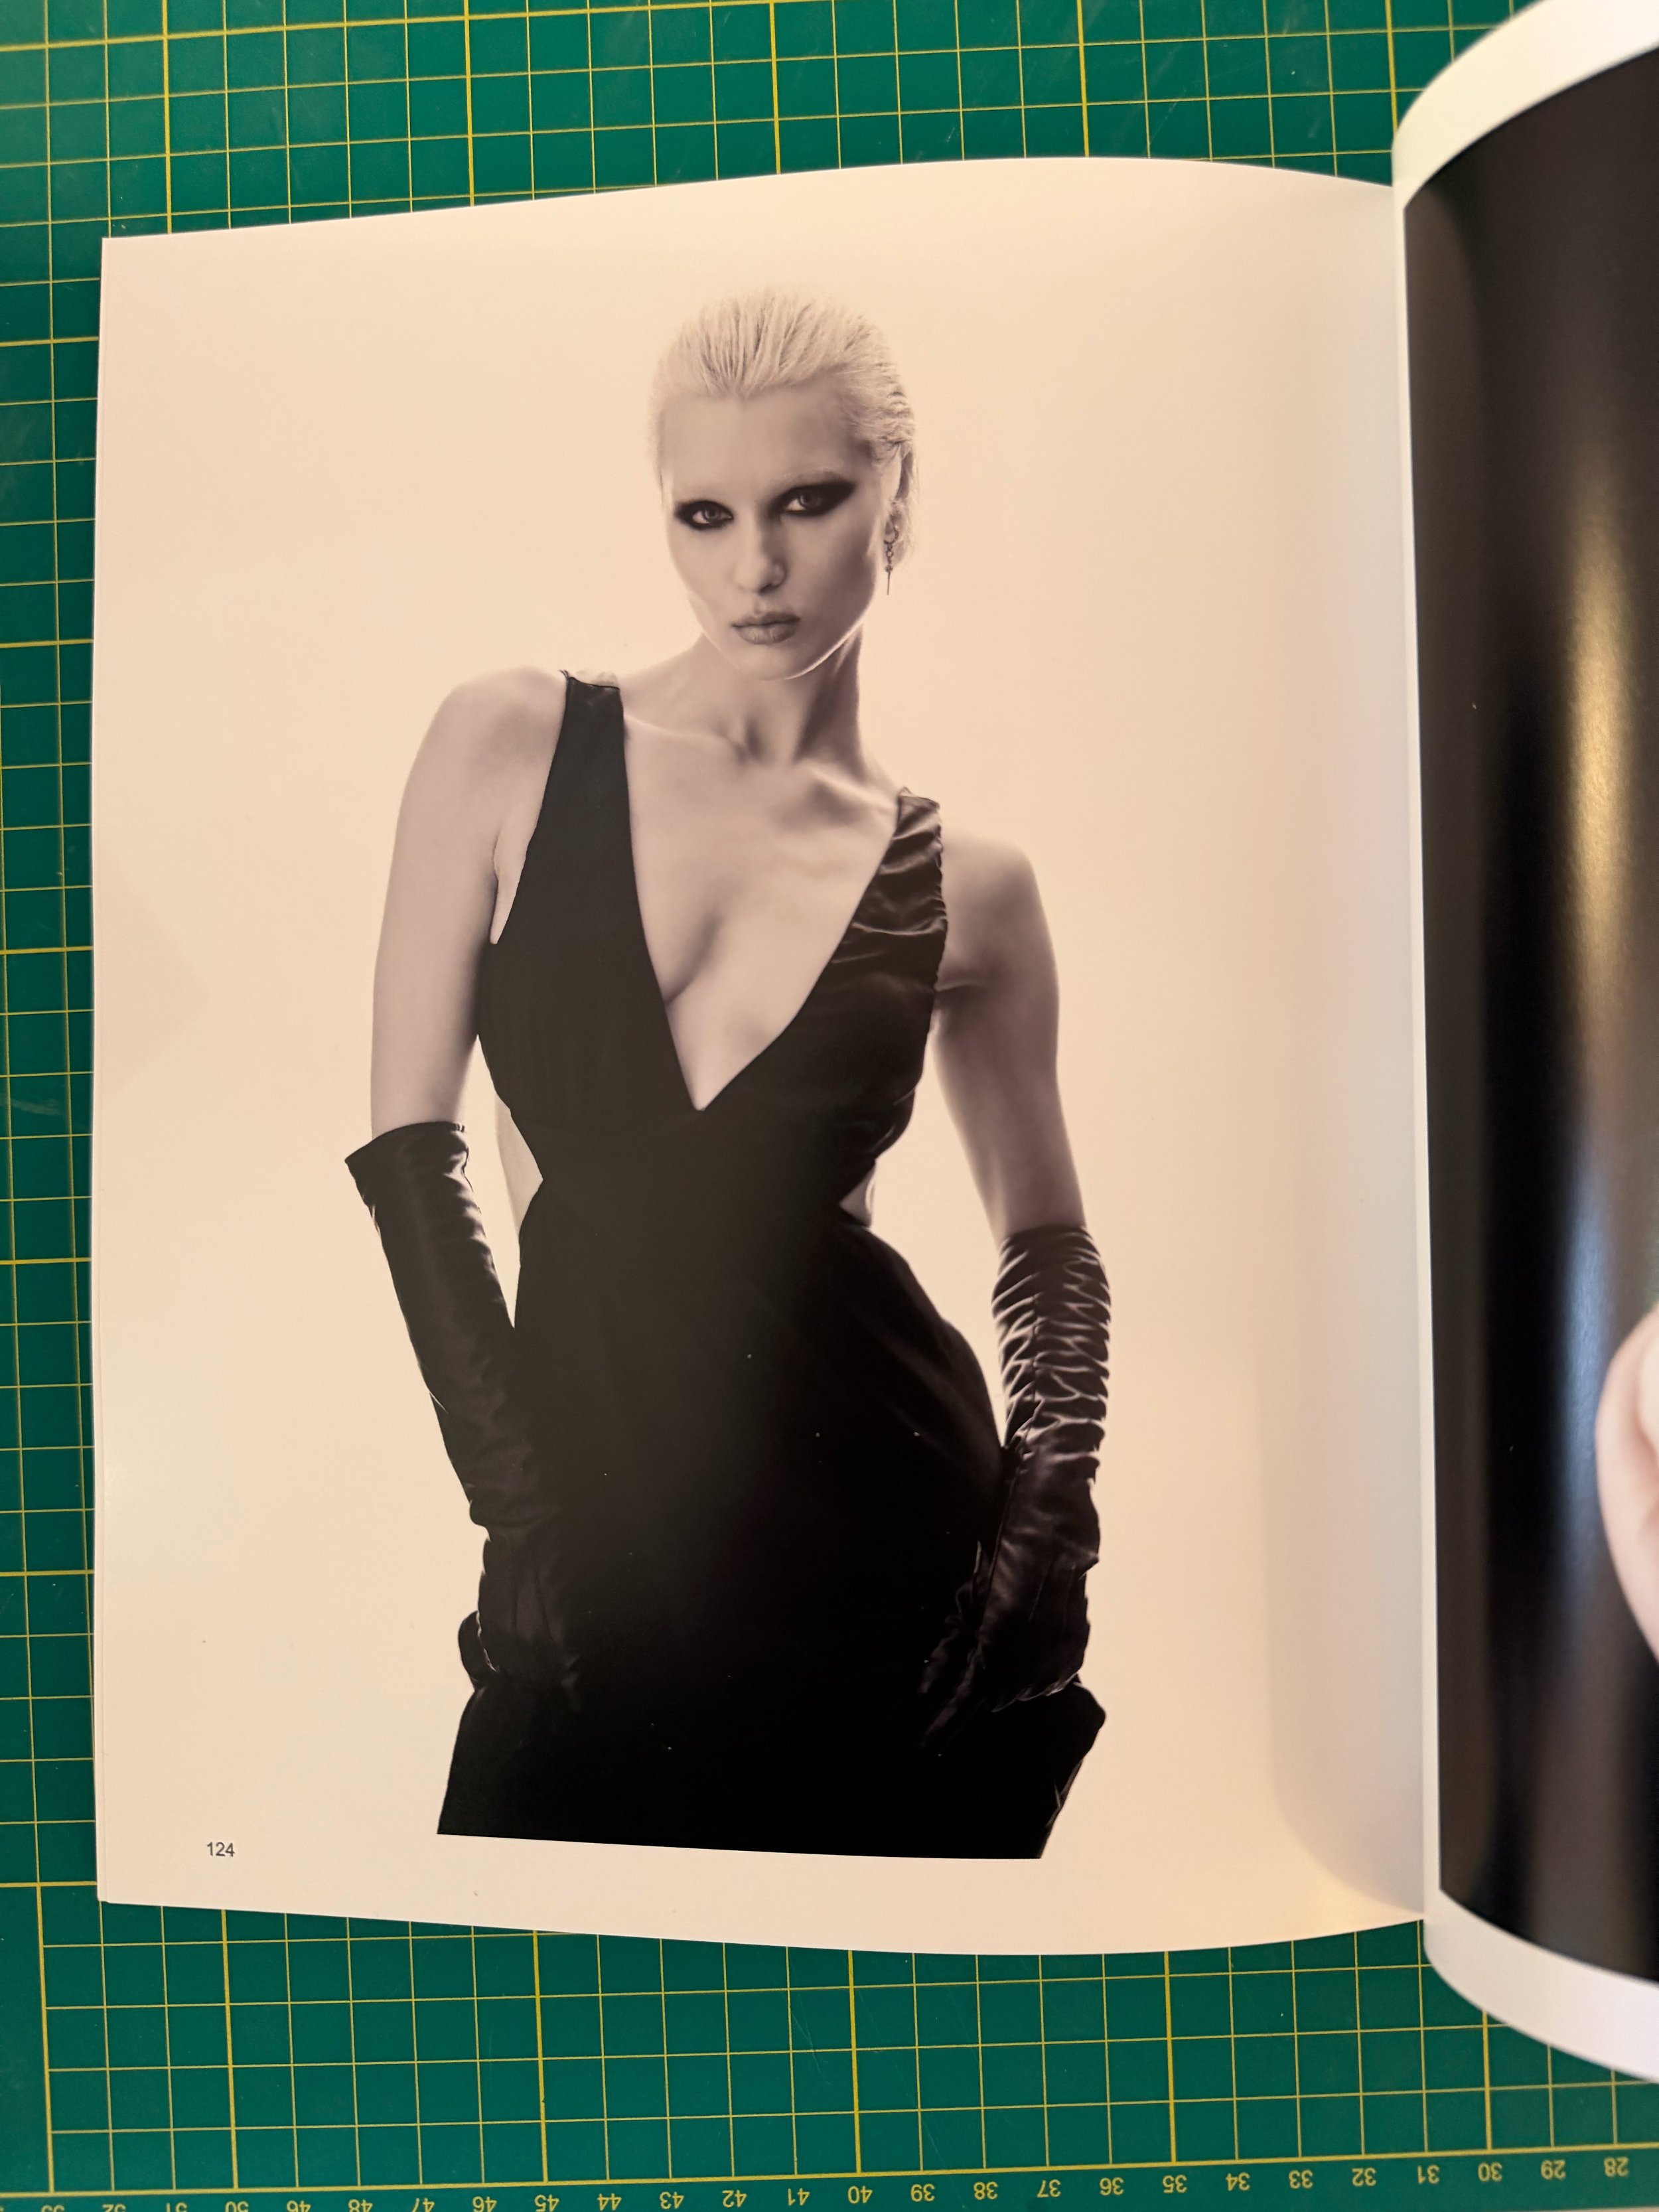
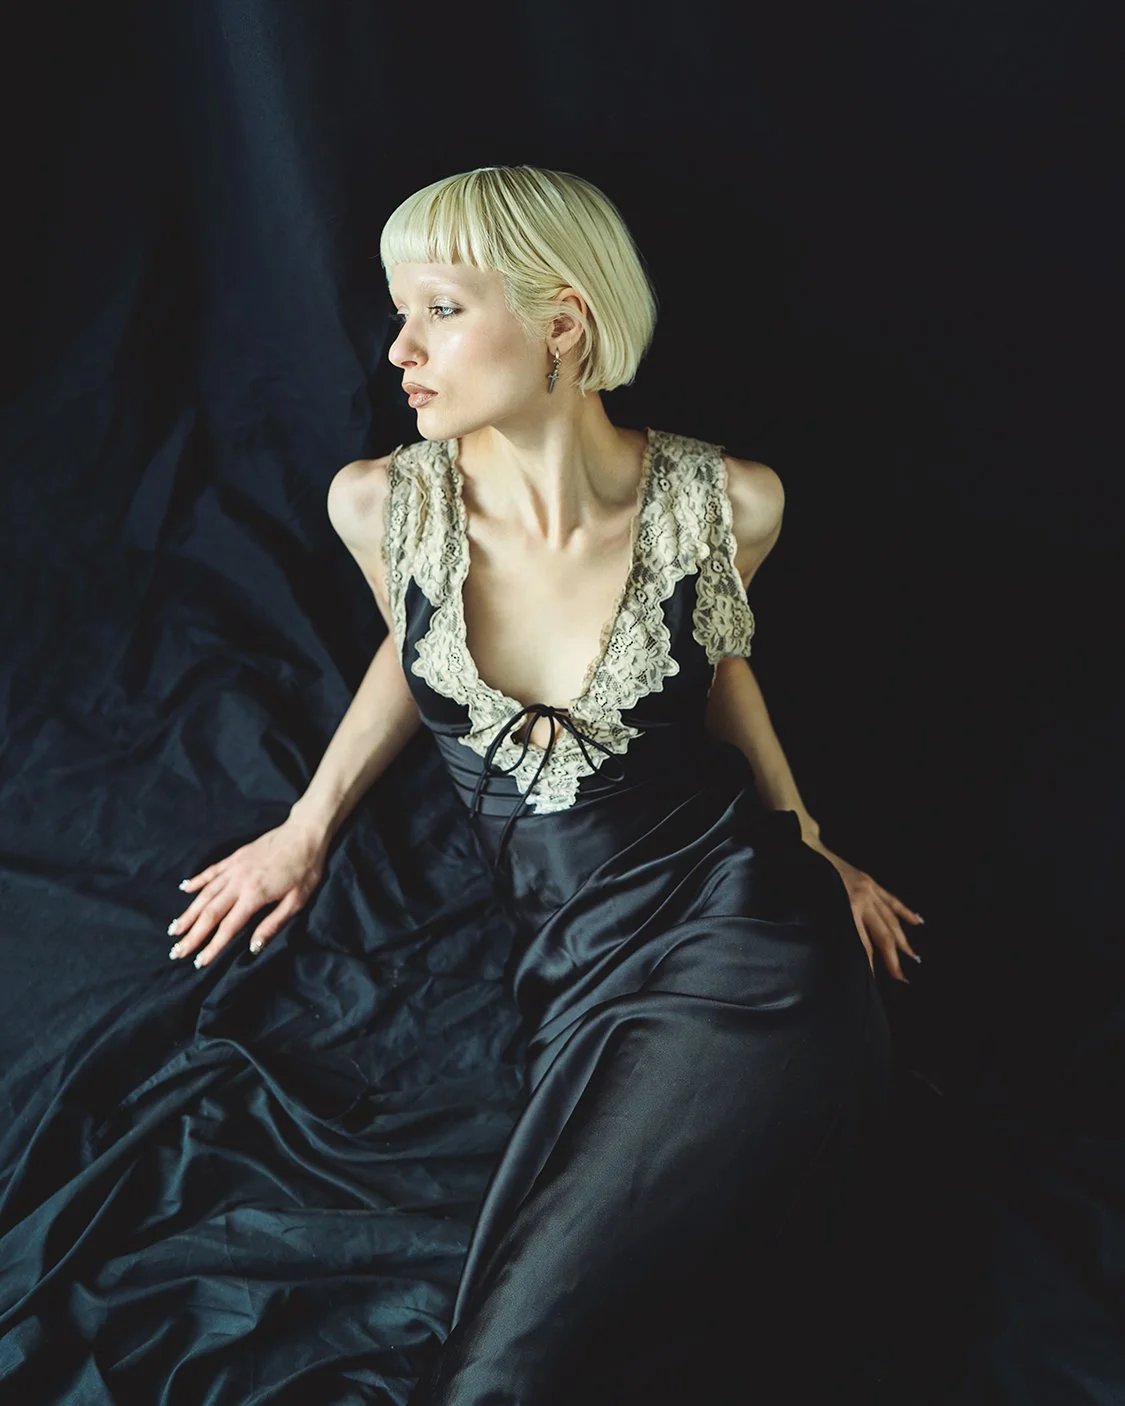
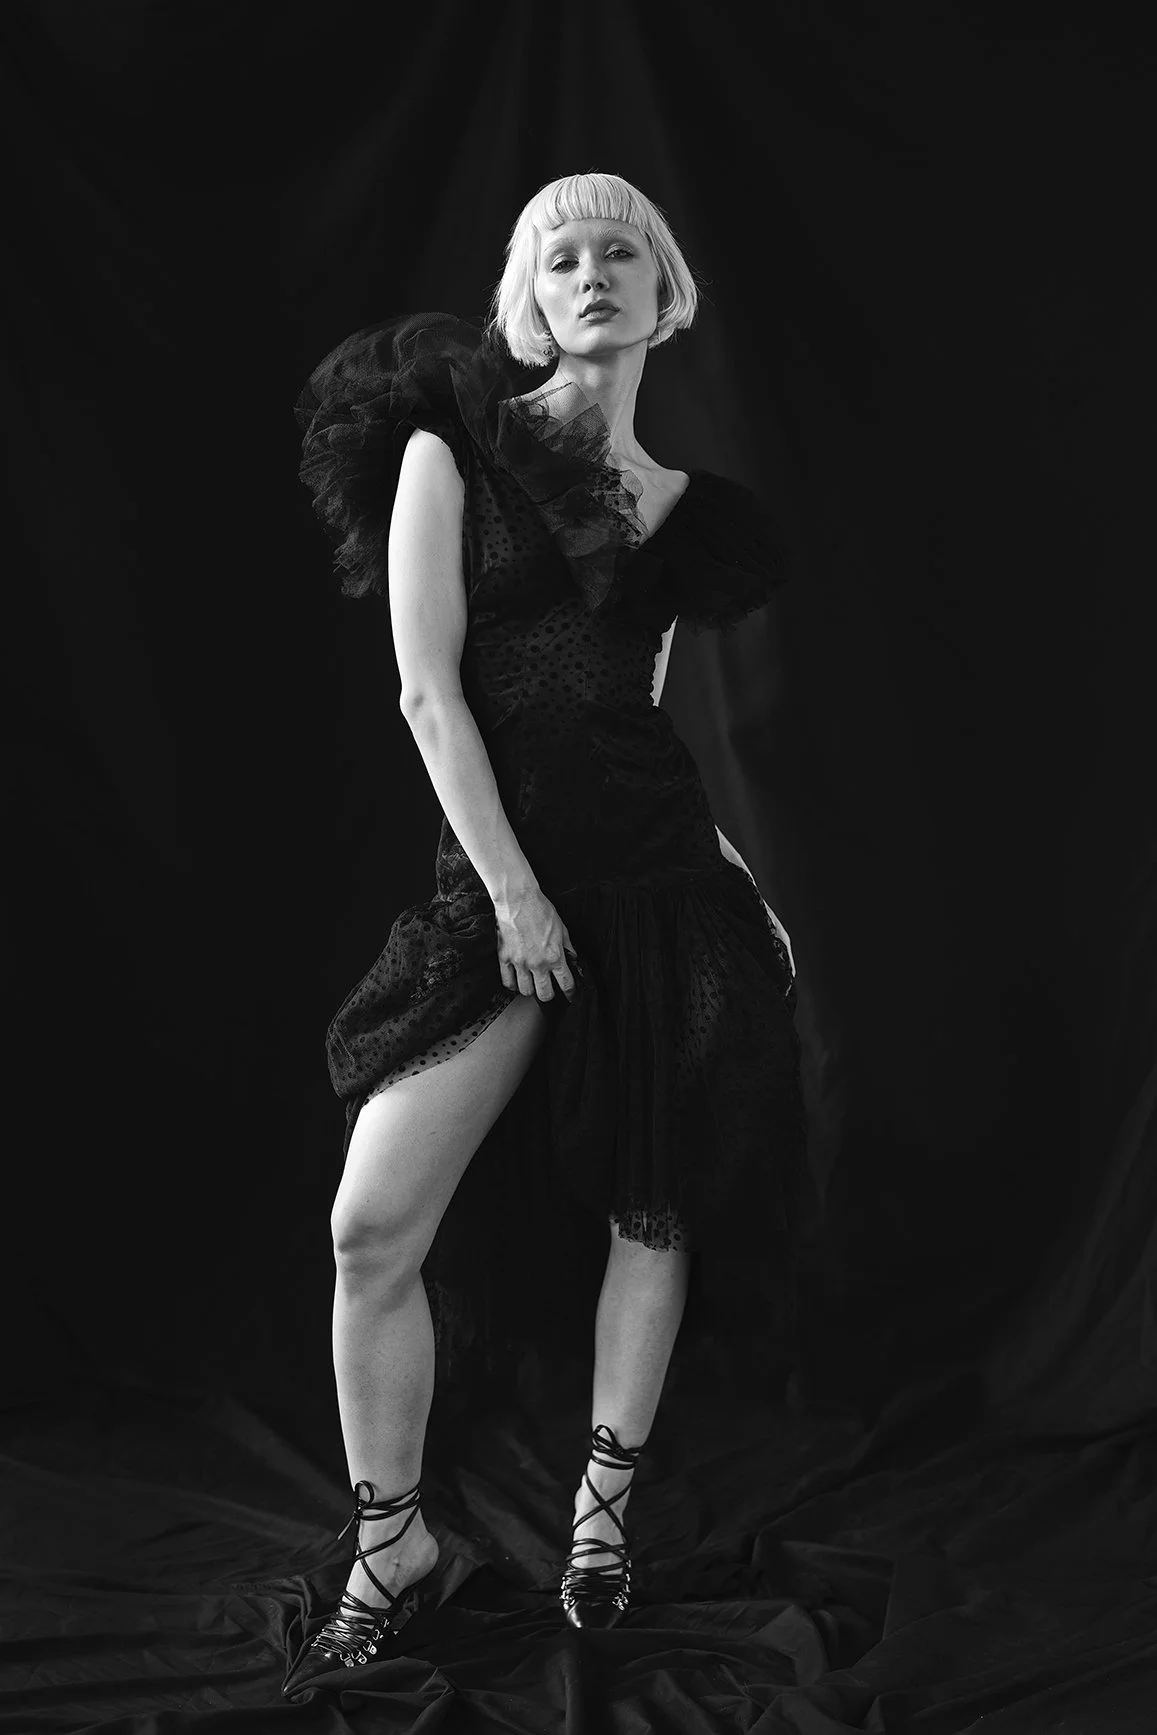
But I do enjoy experimenting with new ideas that tend to sit inside those groups. Of late I have been growing a set of work that combines daylight and a black cloth backdrop. The fabric travels well and daylight is easy to find, after that it's how you use the two. I had asked Saida to bring something elegant, preferably a long black dress and this is what she brought. A beautiful dress her mother had bought her and she had yet to use.
In a past life I enjoyed doing editorials. A spread of photos that were more lifestyle than pure fashion. I’ve always been drawn to the glamour of fashion photography, but my heart is people and so I do trend towards an editorial style. I like creating sets and building a sequence of images that tell a story. Some full frame (like the image above) others that show the garment and then closer still to show feeling and emotion. I’m not doing this for a publication, I do it because I enjoy it and its nice to step back in time.
Takeaway: Make sure you leave with images that feel like yours. Trends fade, but your body of work should feel consistent over time.
#4 Capture the Person, Not Just the Model
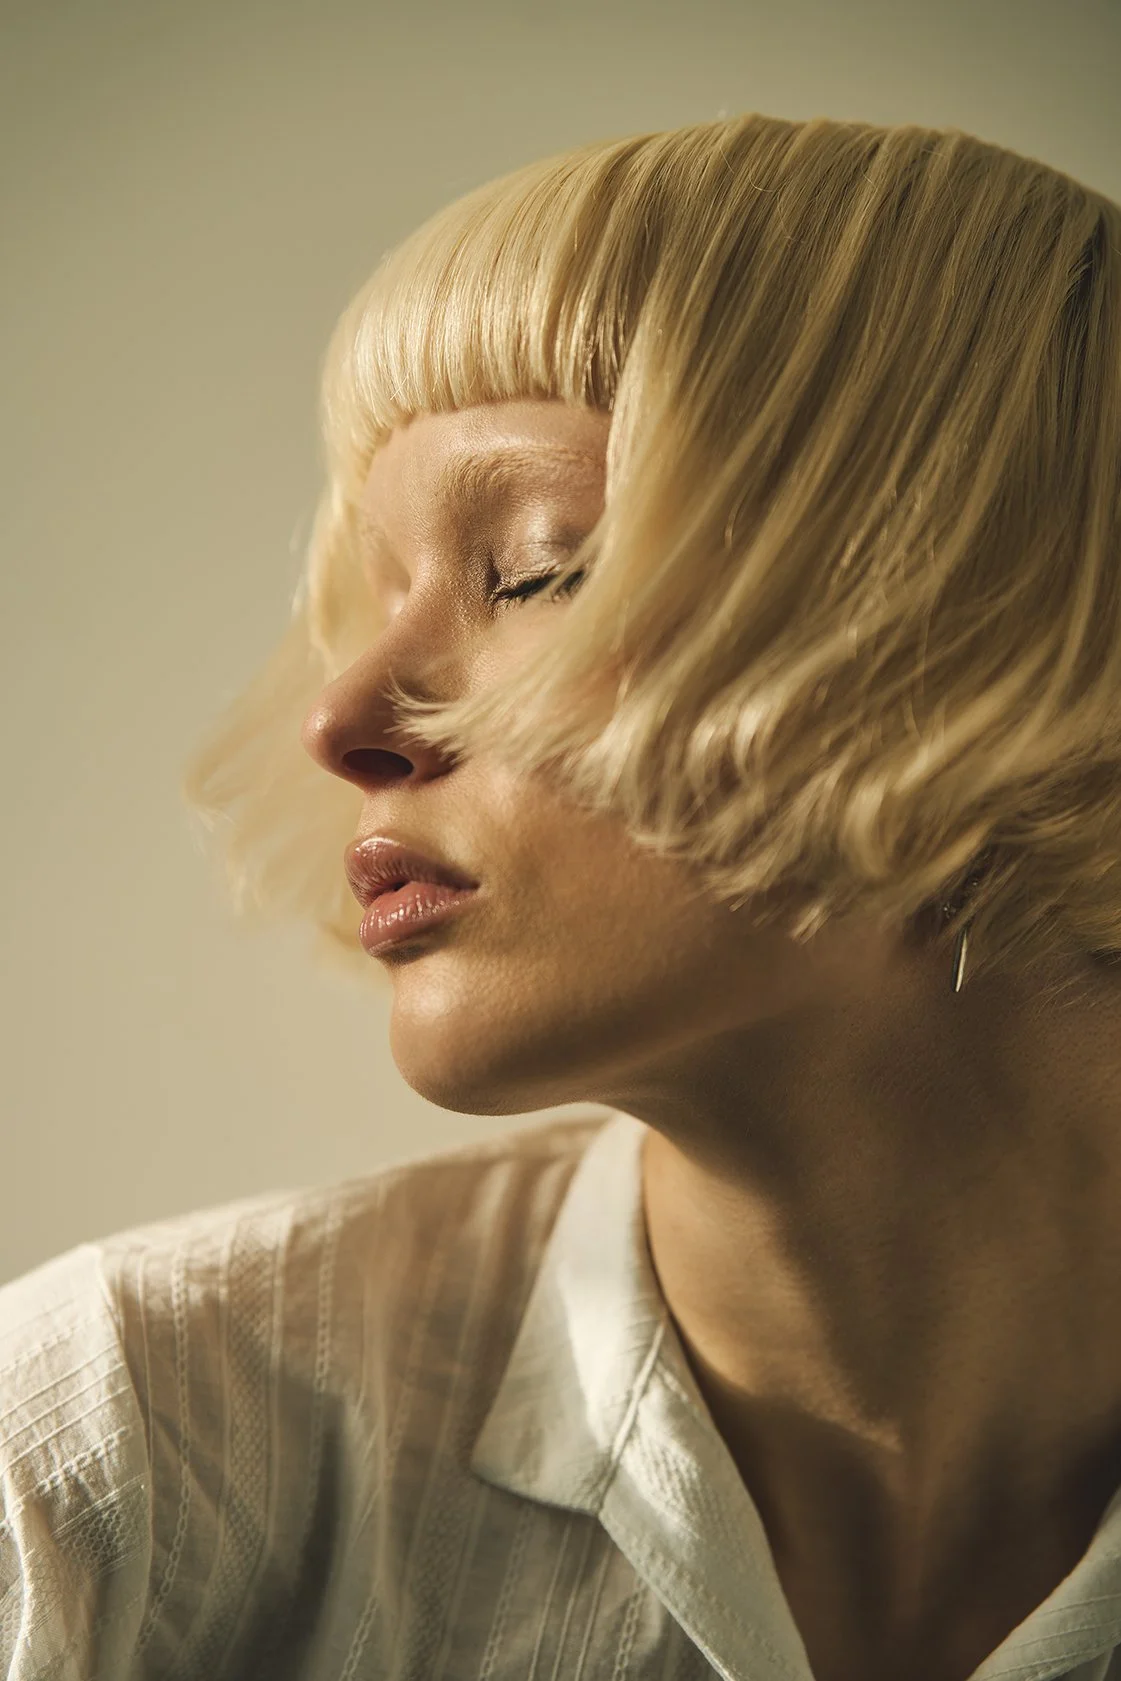
I really enjoy a shoot, I find I get lost in the process and instinctively follow a path. I often shoot through images knowing the one I want is a few steps away. But sometimes the context of what you are working on is interrupted by something unexpected and beautiful. When those moments happen, make sure you take them, even if that means breaking the original flow.
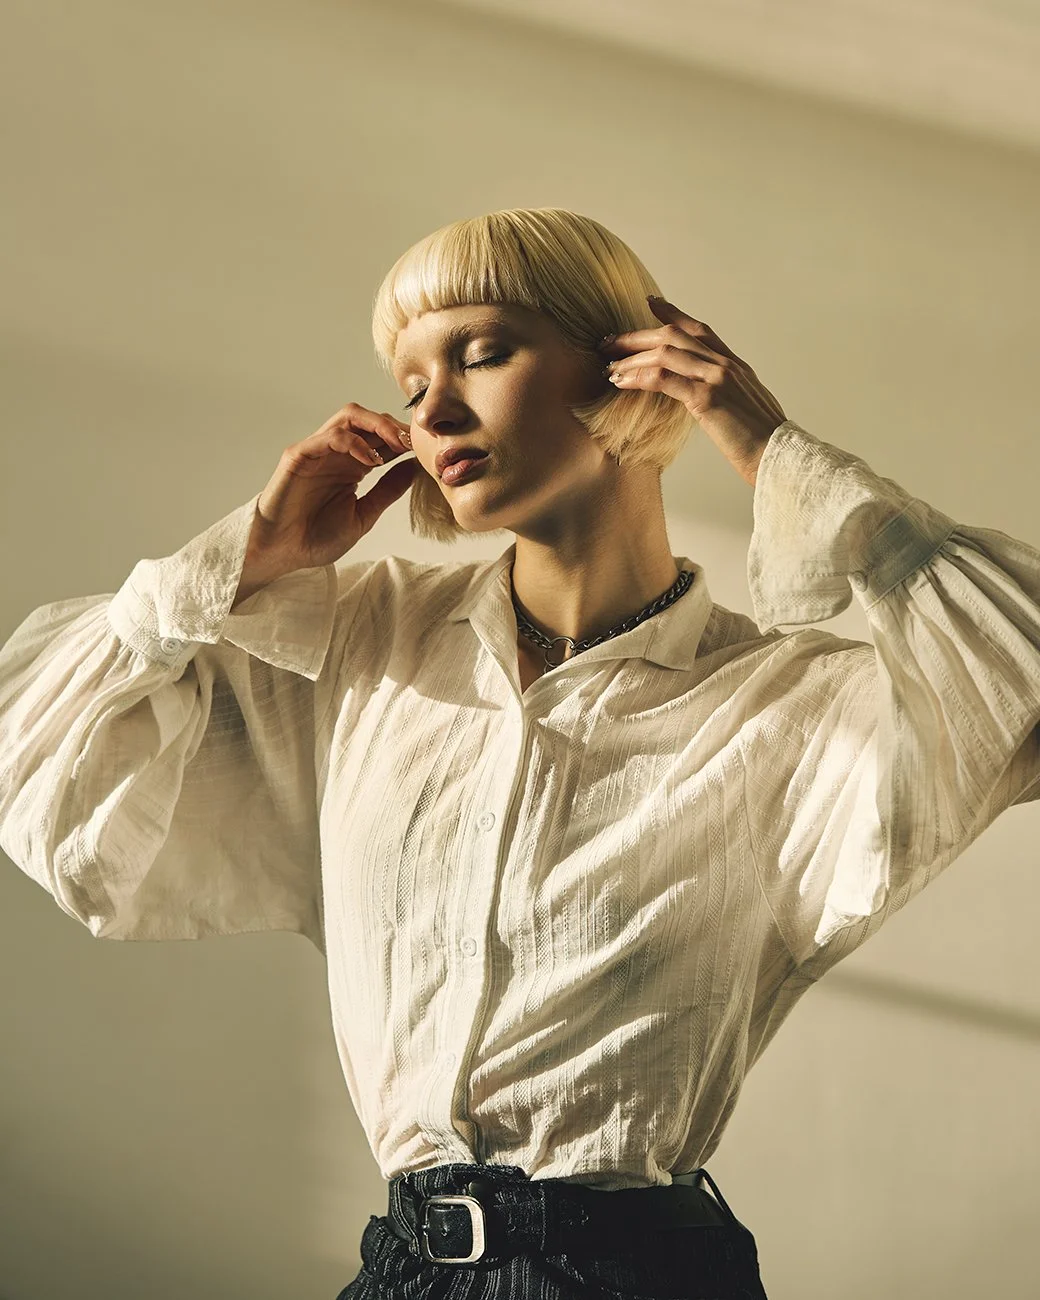
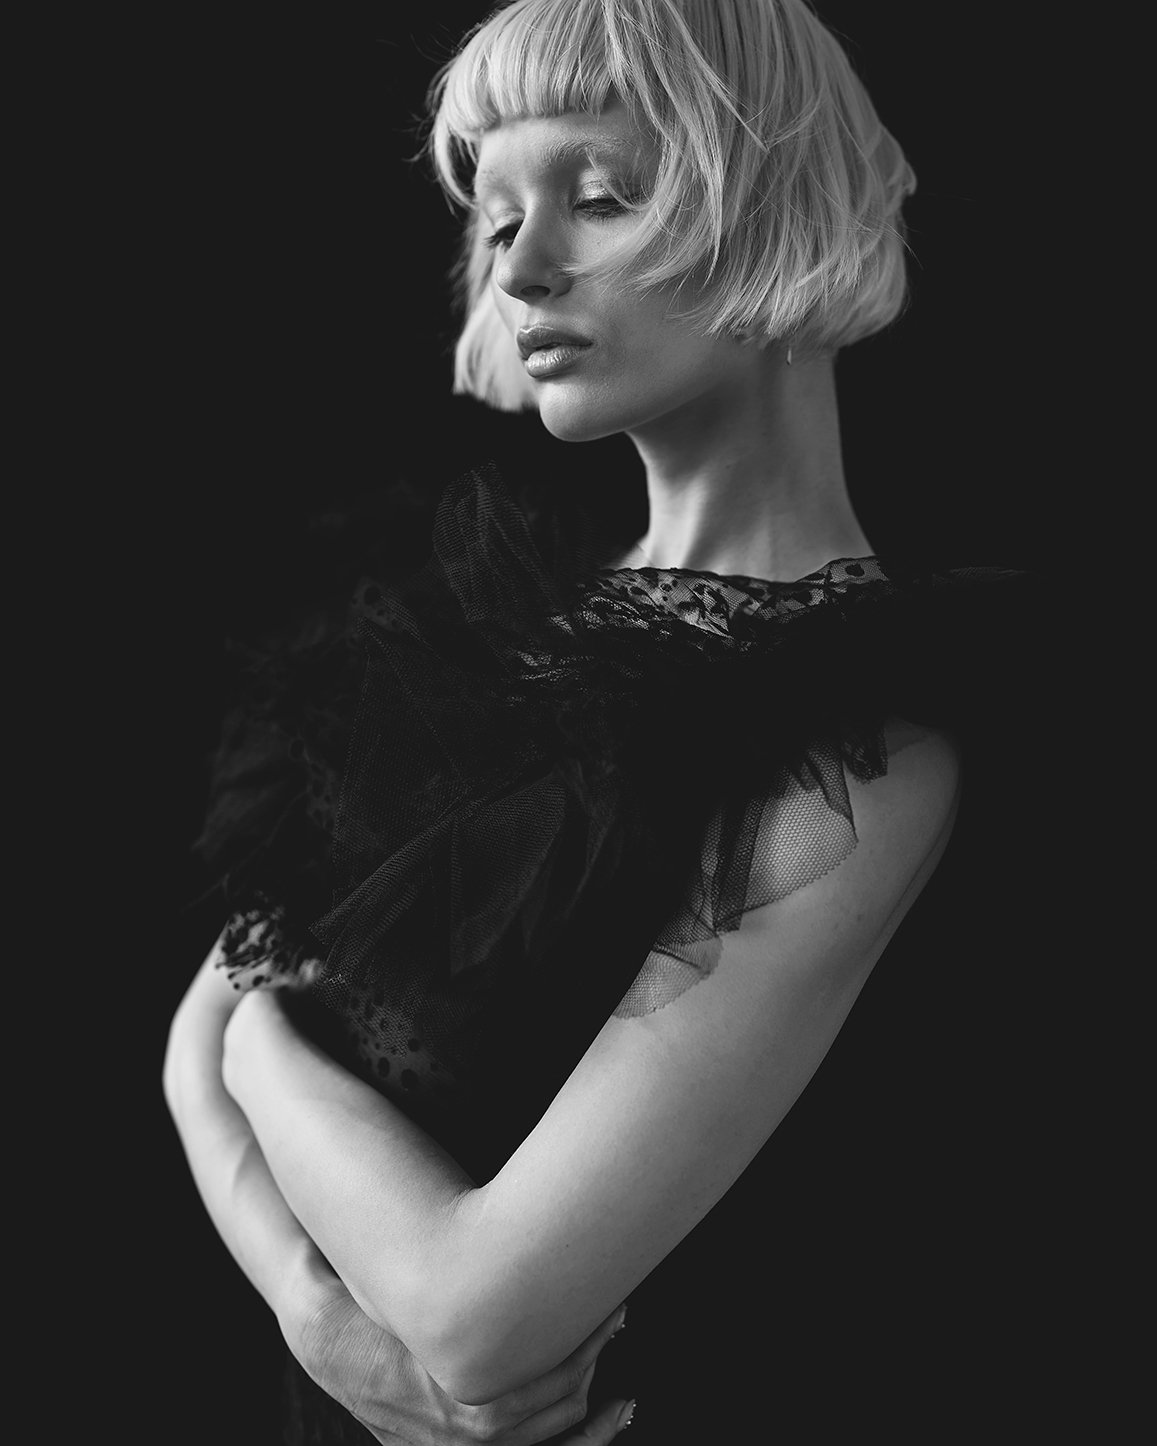
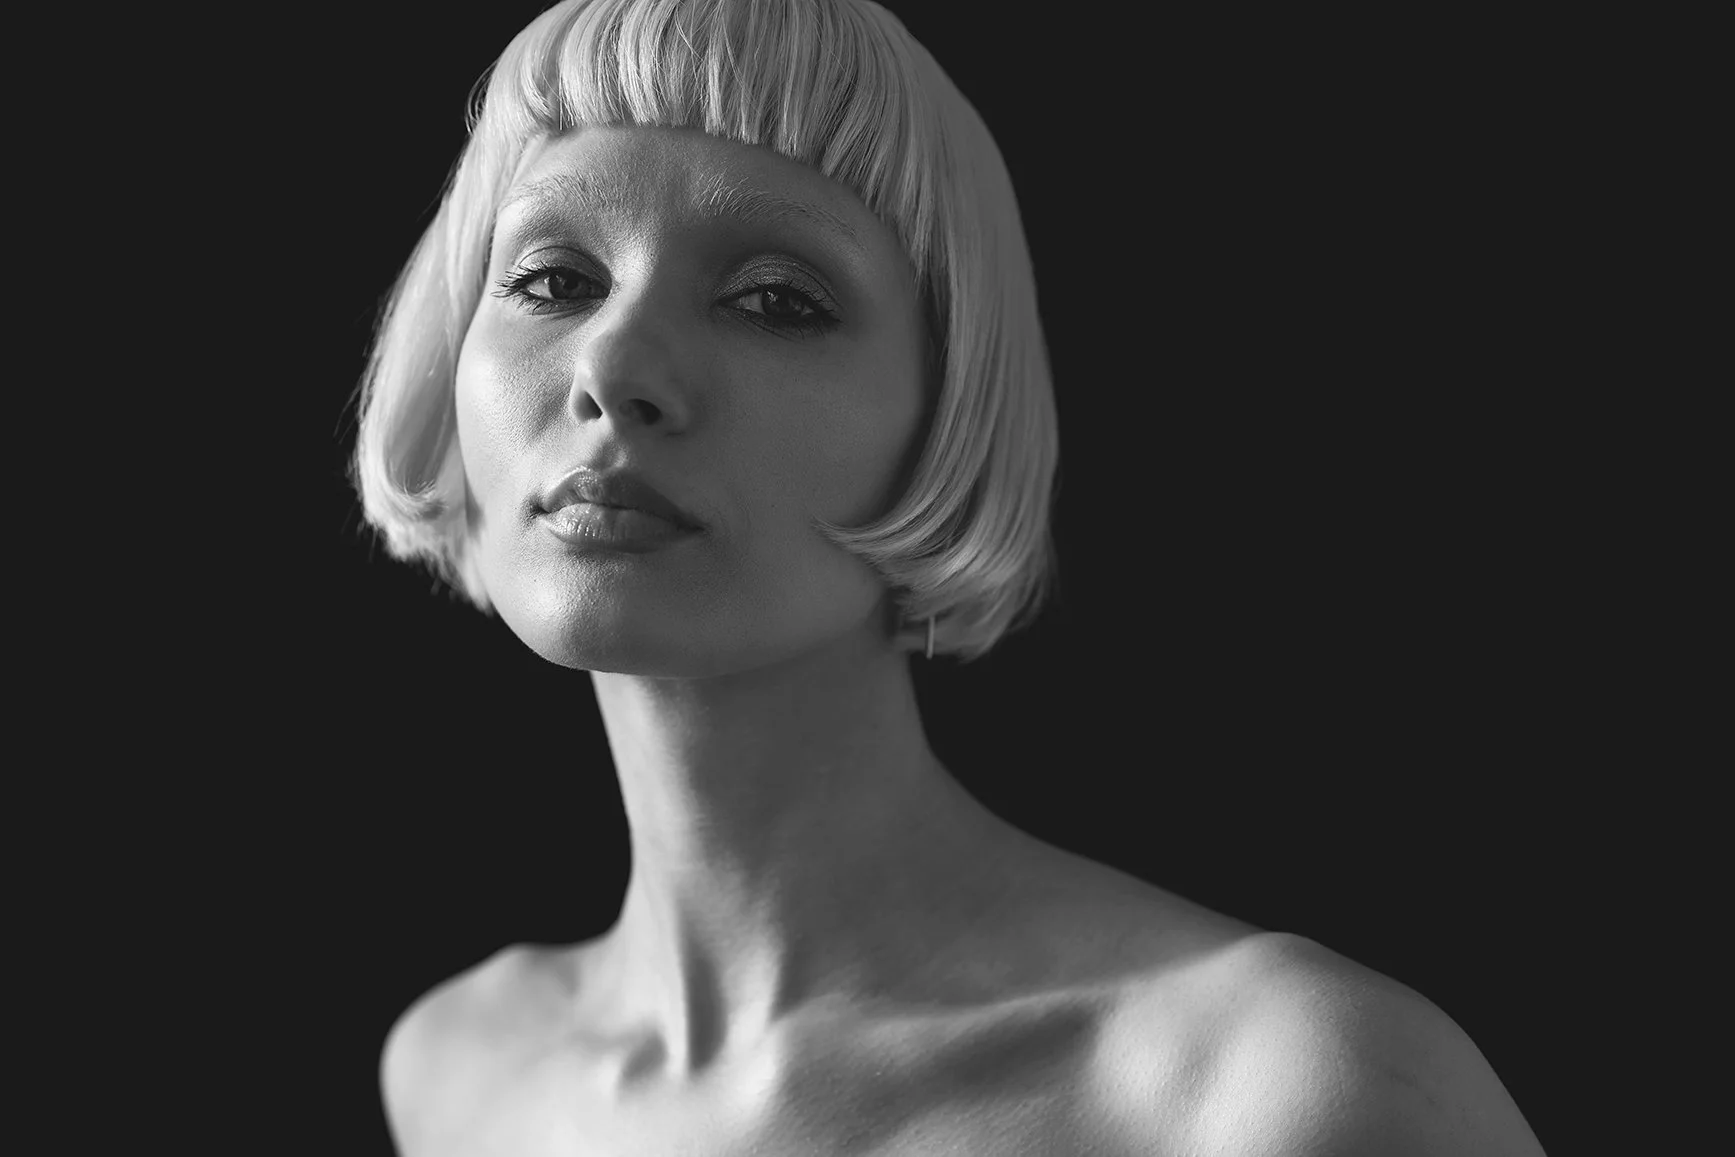
Saida and I were working through the set of images above. I had turned on the small fan and it was just touching her hair. She was in a flow, her poses coming naturally. Once I felt we’d banked the key images I asked her to pause, close her eyes and relax. In that moment she showed herself. I caught a glimpse of the person, not the model. These moments are precious, a gift, one that needs taking even if that means you have to park your original plan.
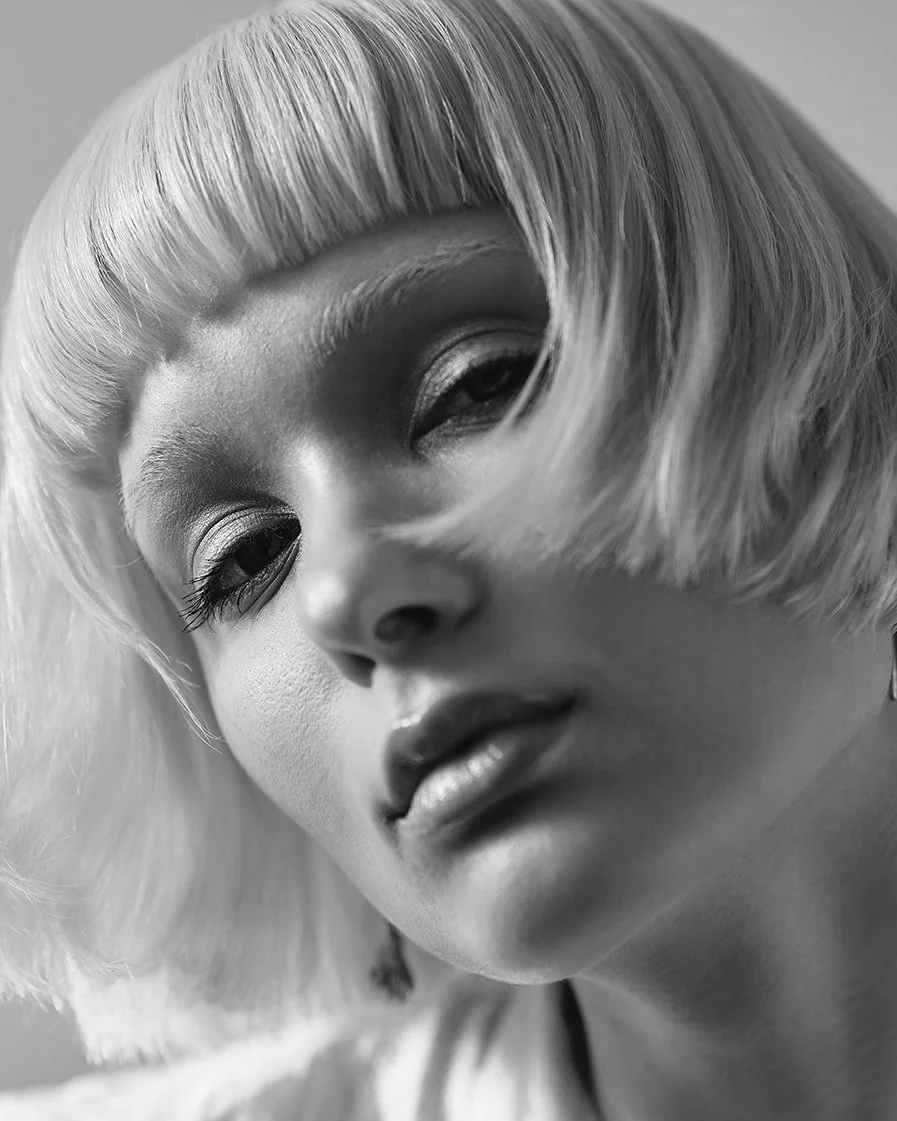
I mentioned I also enjoy portraits. We used this same light and set up to focus on something simpler. Something honest.
Takeaway: Don’t be afraid to allow those unexpected moments to take over your planned set. They are hard to replicate and don’t happen often.
#5 Stay one step ahead of the light.
By now it was almost midday, we’d been shooting for an hour and a half and I was conscious that the light in the studio would start to fade. I had used the space once before so I knew the light would start to arc away as of 1pm and in reality a little sooner as this was December and the sun was lower. I use an app on my phone that shows the position of the sun in augmented reality (which means you point your phone in the air and it shows you where the sun wil be hour by hour) and this ensures I can plan how to use the light in any space.
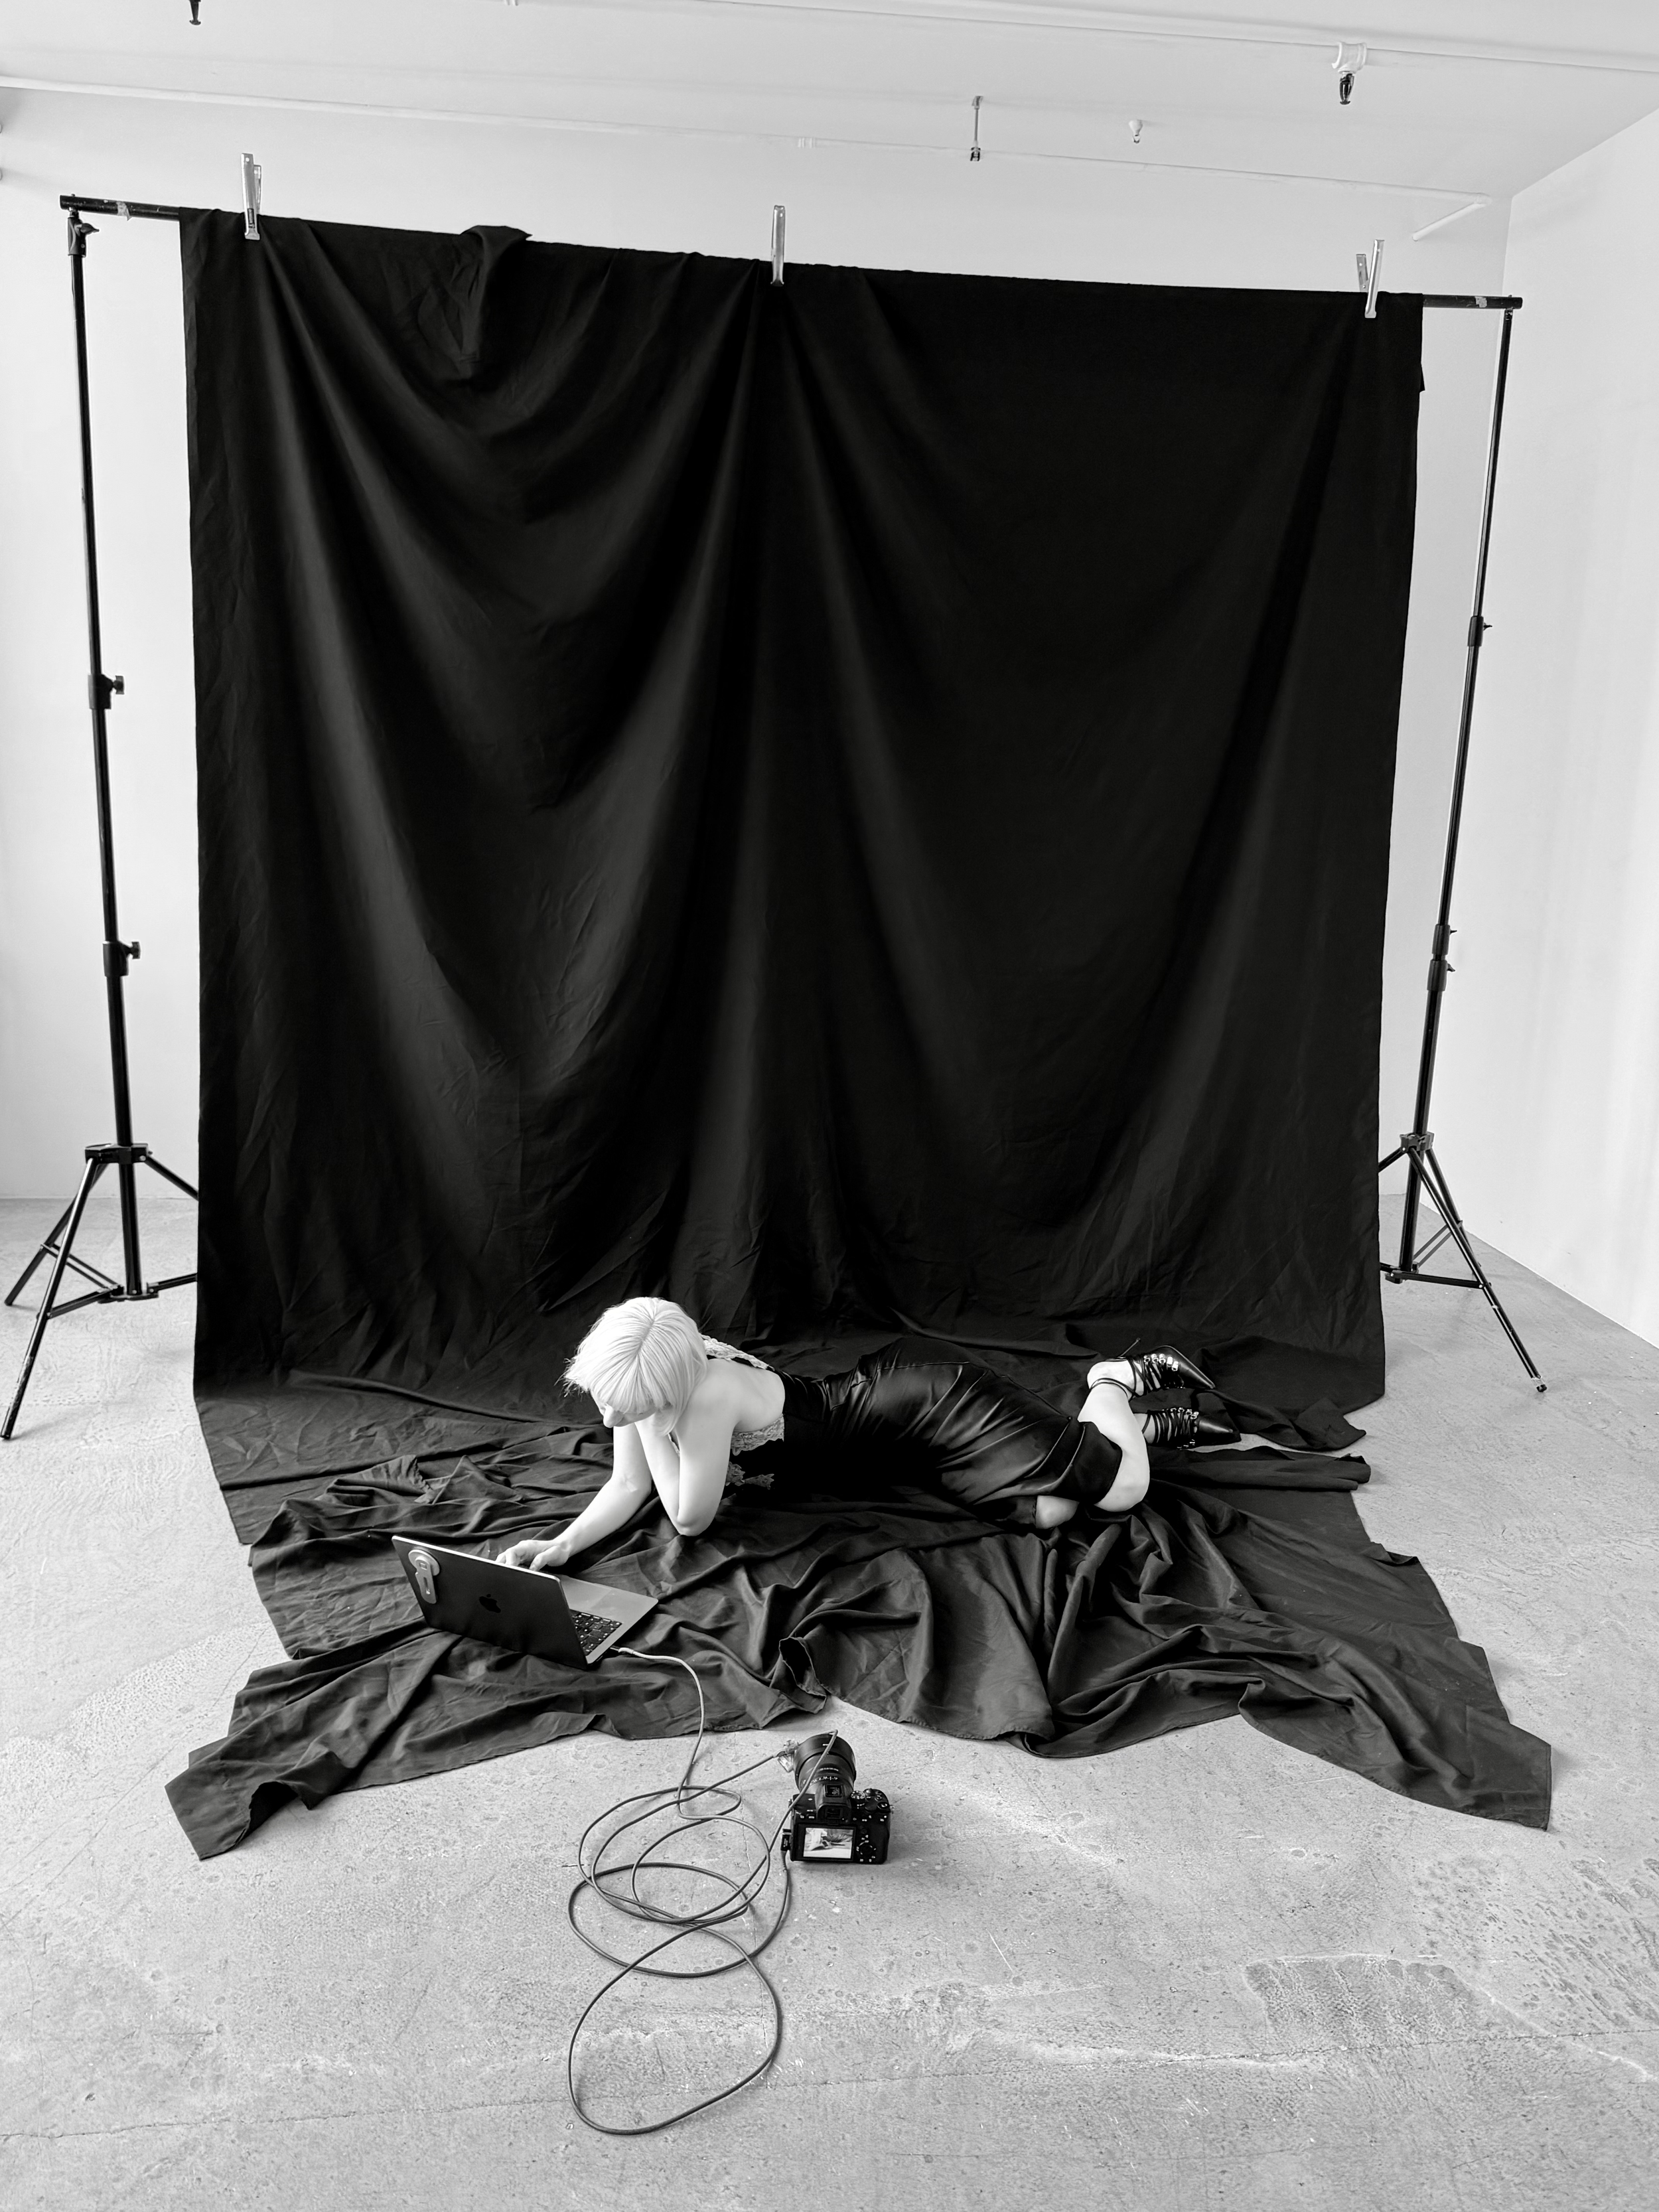
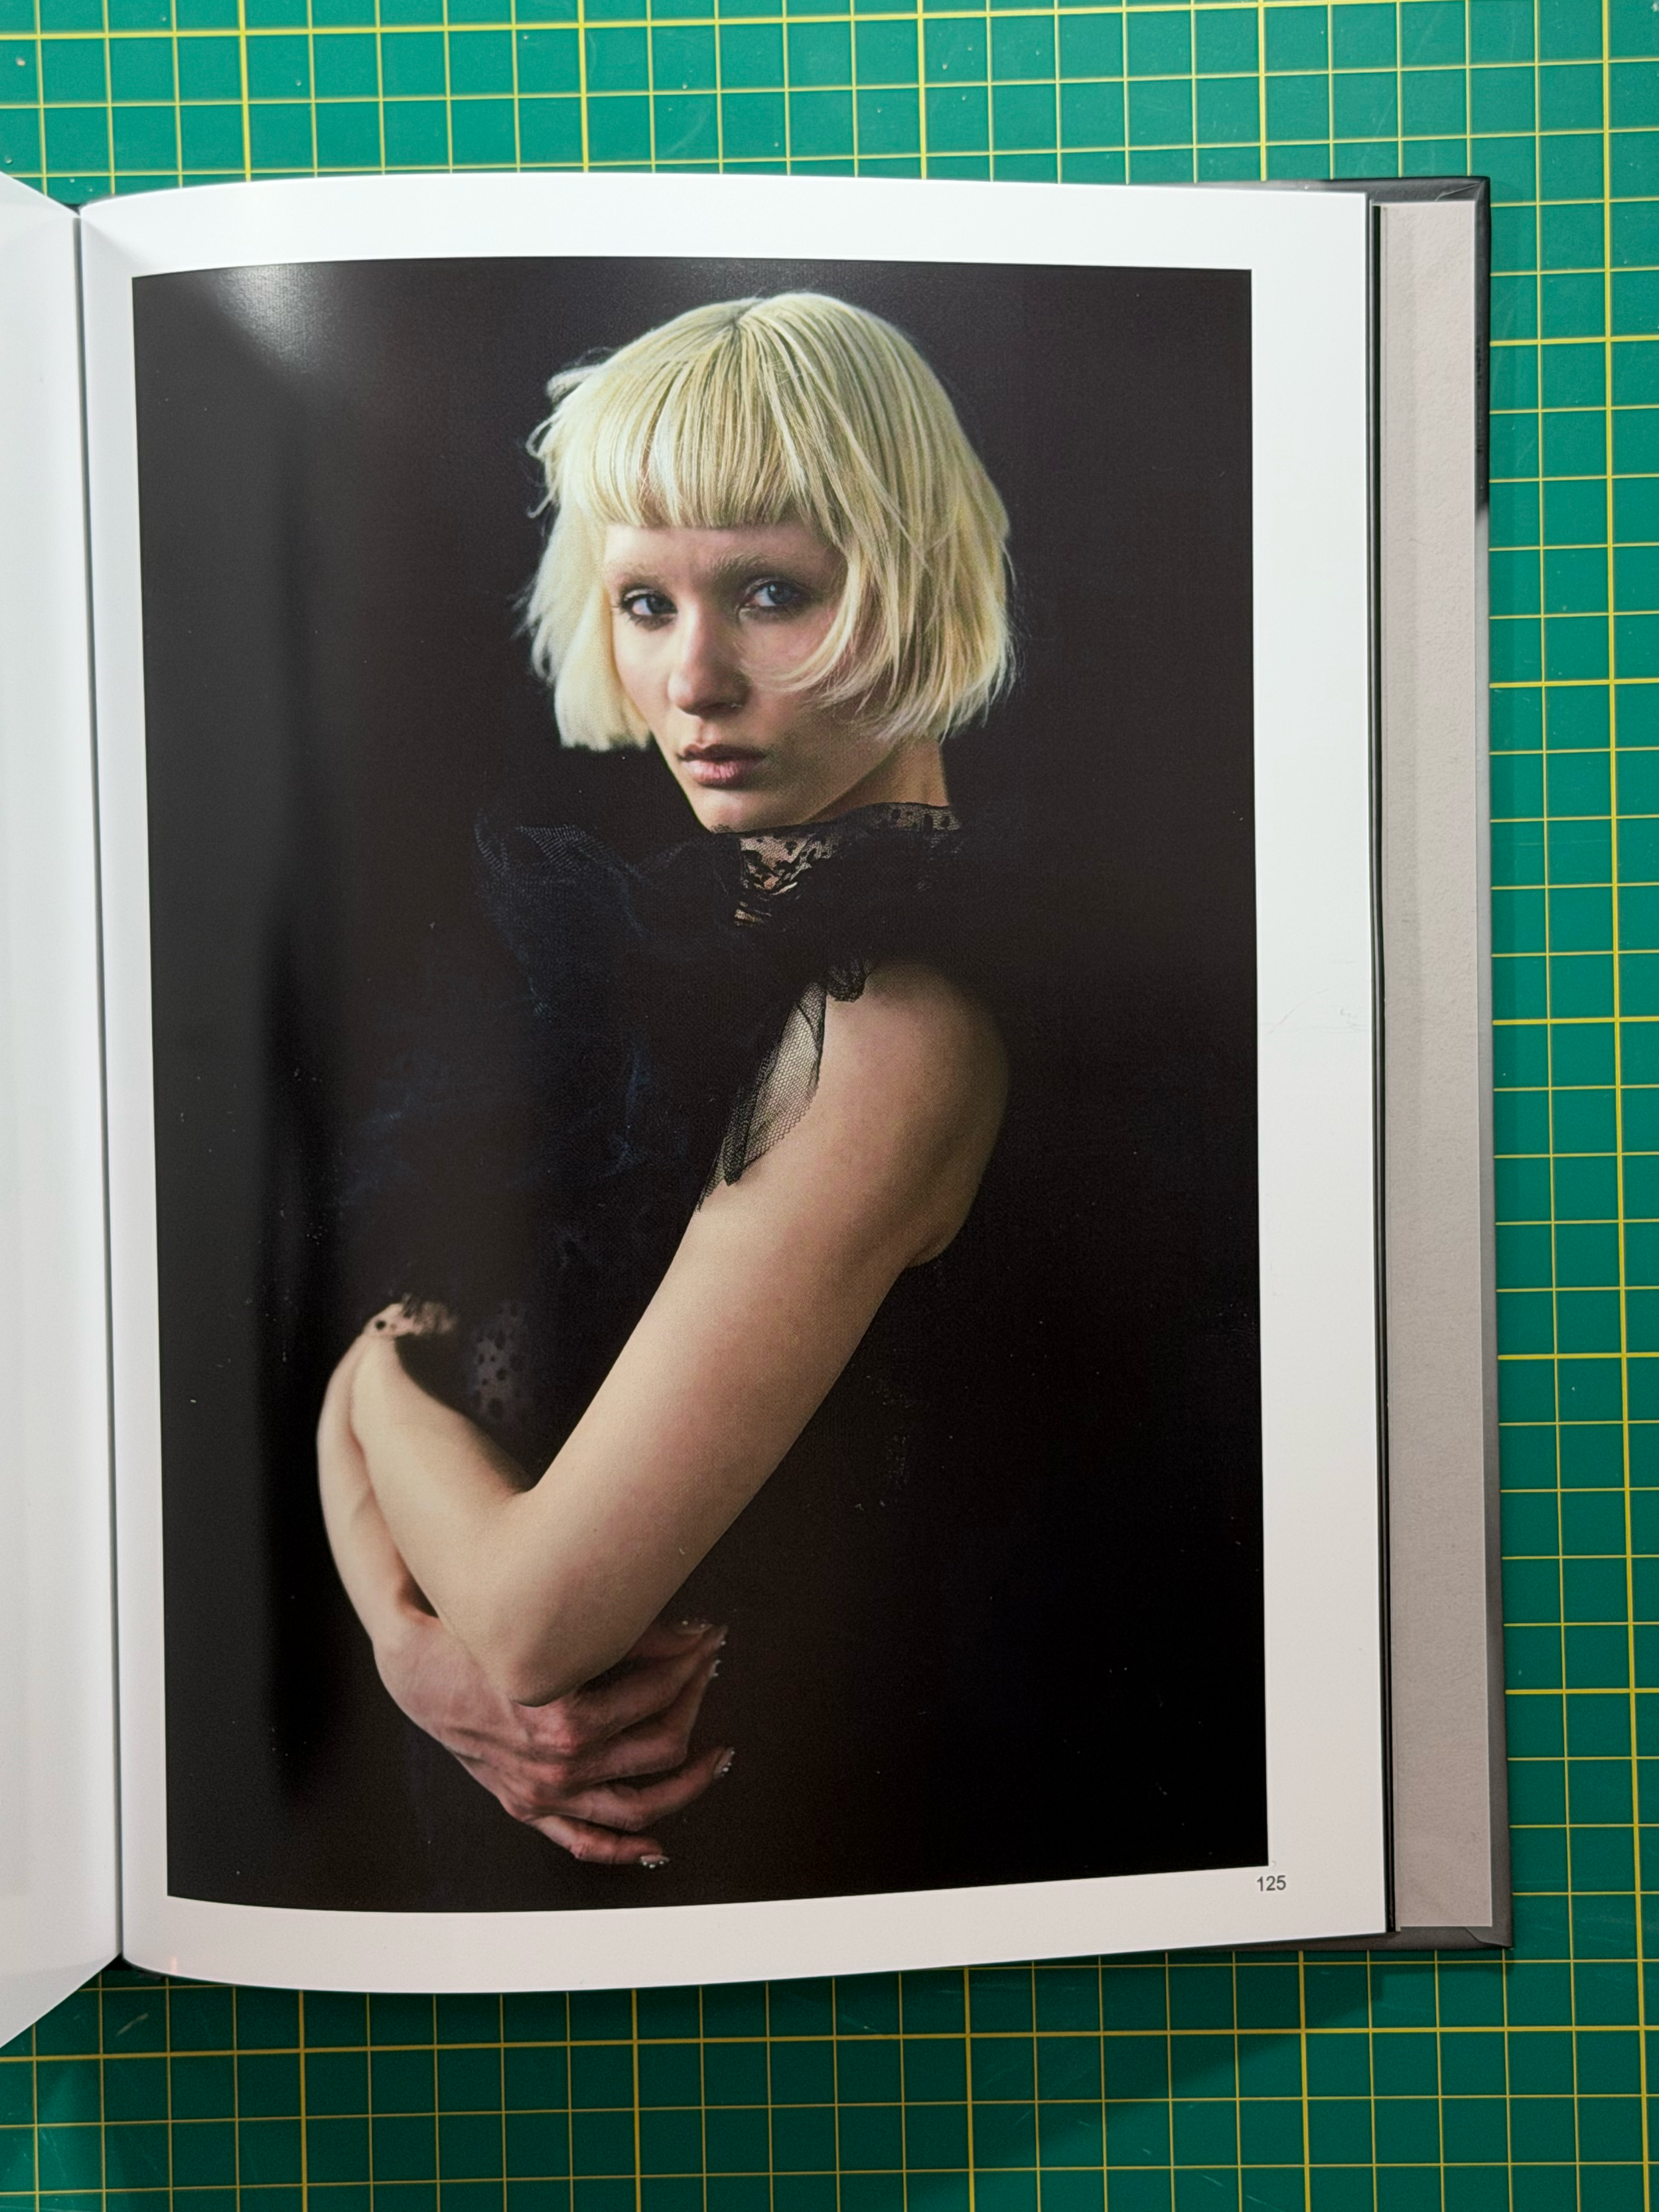
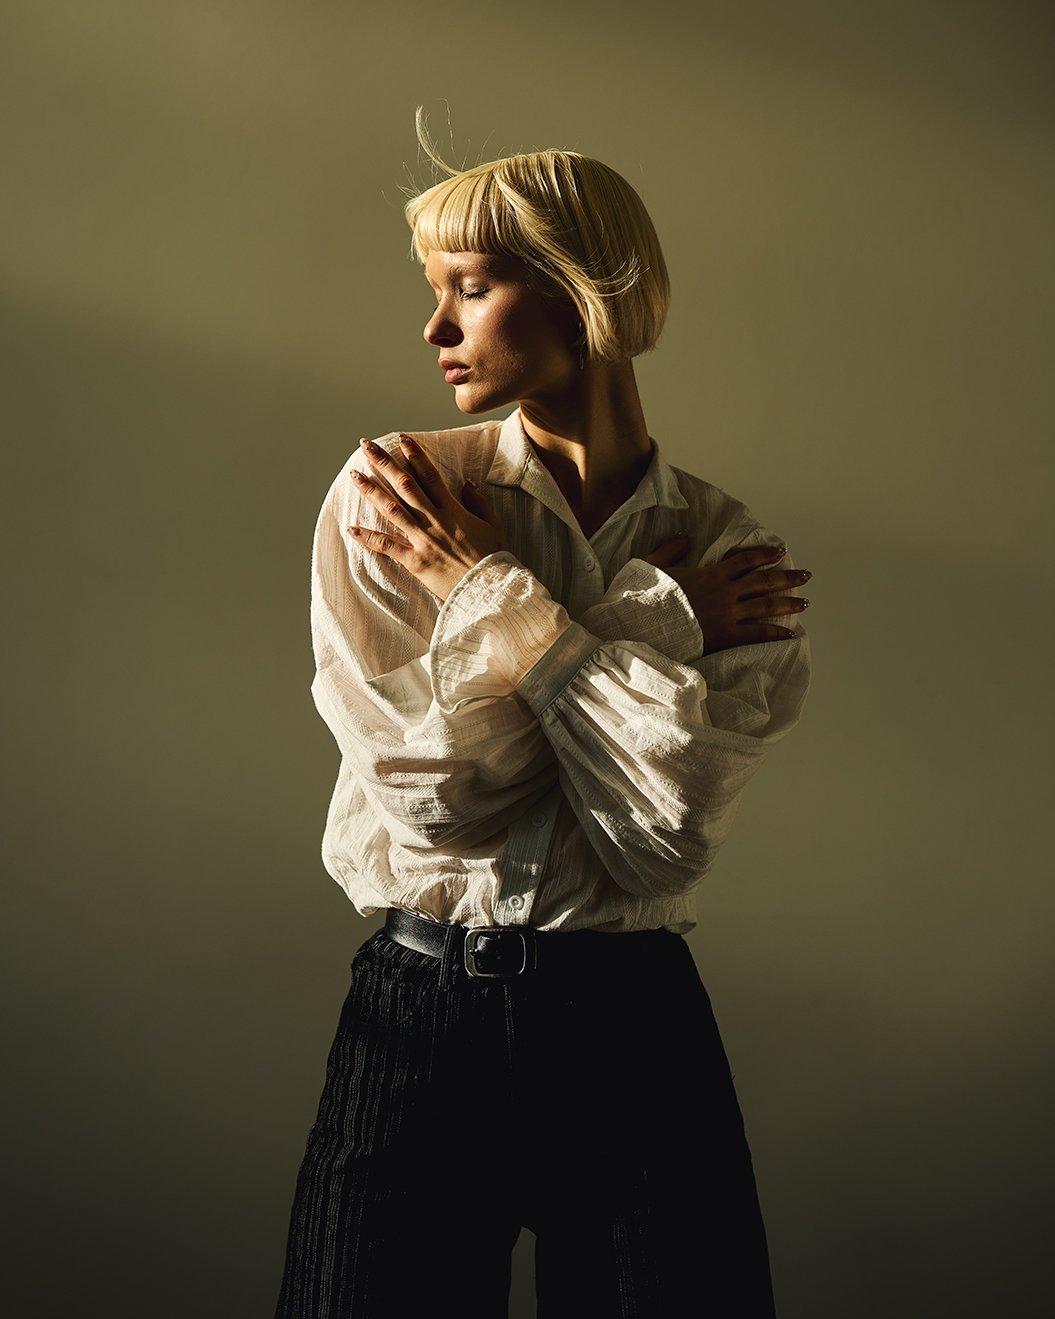
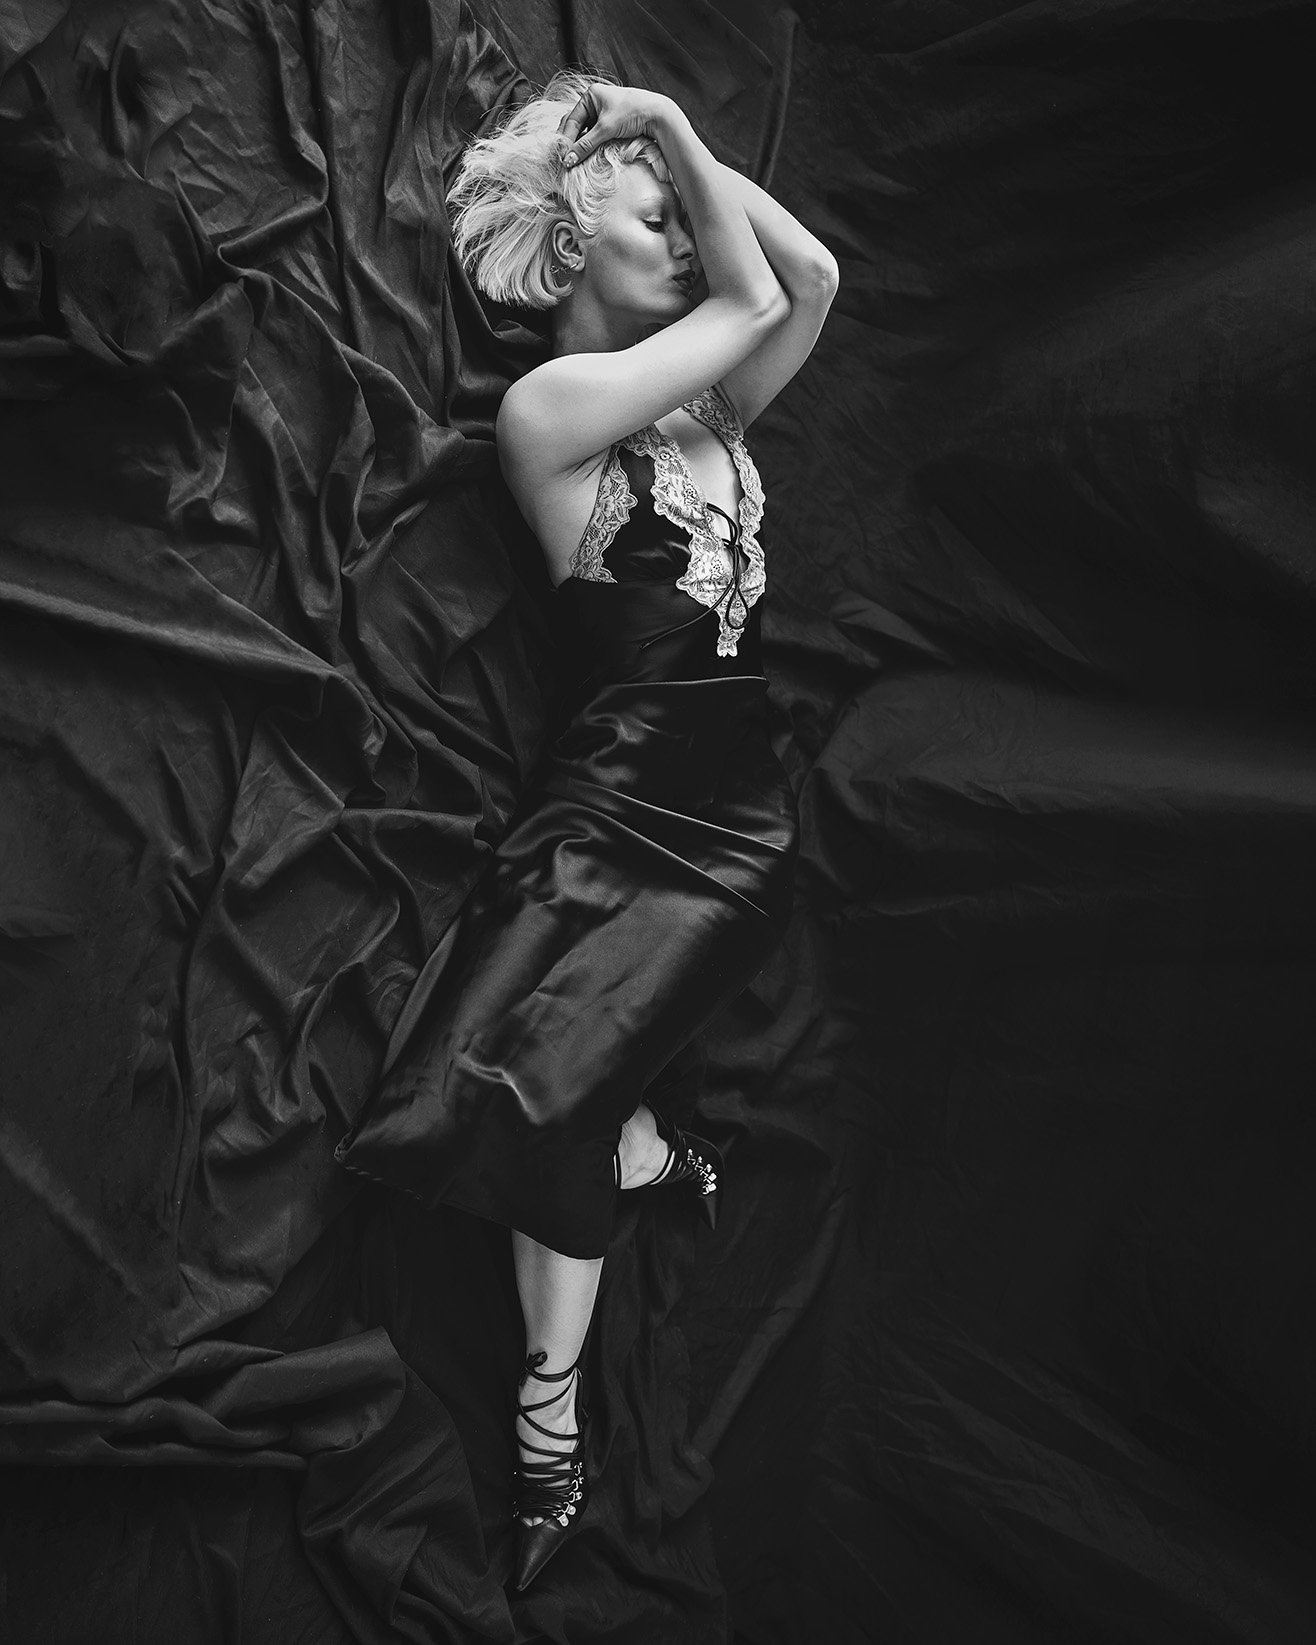
So rather than break the set and spend time creating a new one, I asked Saida to switch outfits and we used the same set up to build a calm sequence of images that complemented her silk dress. She explained she had to rescue the lace by dabbing damp teabags on the fabric to bring back the original colours after an overly aggressive stint in a washing machine. The outfit clearly had meaning to her so I let her slow down and use that sentiment. We took many images, a number of which were of her lying down on the black fabric which seemed to merge with her black dress.
This image was taken as a landscape image, but once home I rather liked it in portrait as it really shows how the two fabrics work together.
Takeaway: I don’t recommend clock watching when shooting, but do be mindful of what the light is doing and maximise it where you can.
#6 Lunch can be part of the shoot.
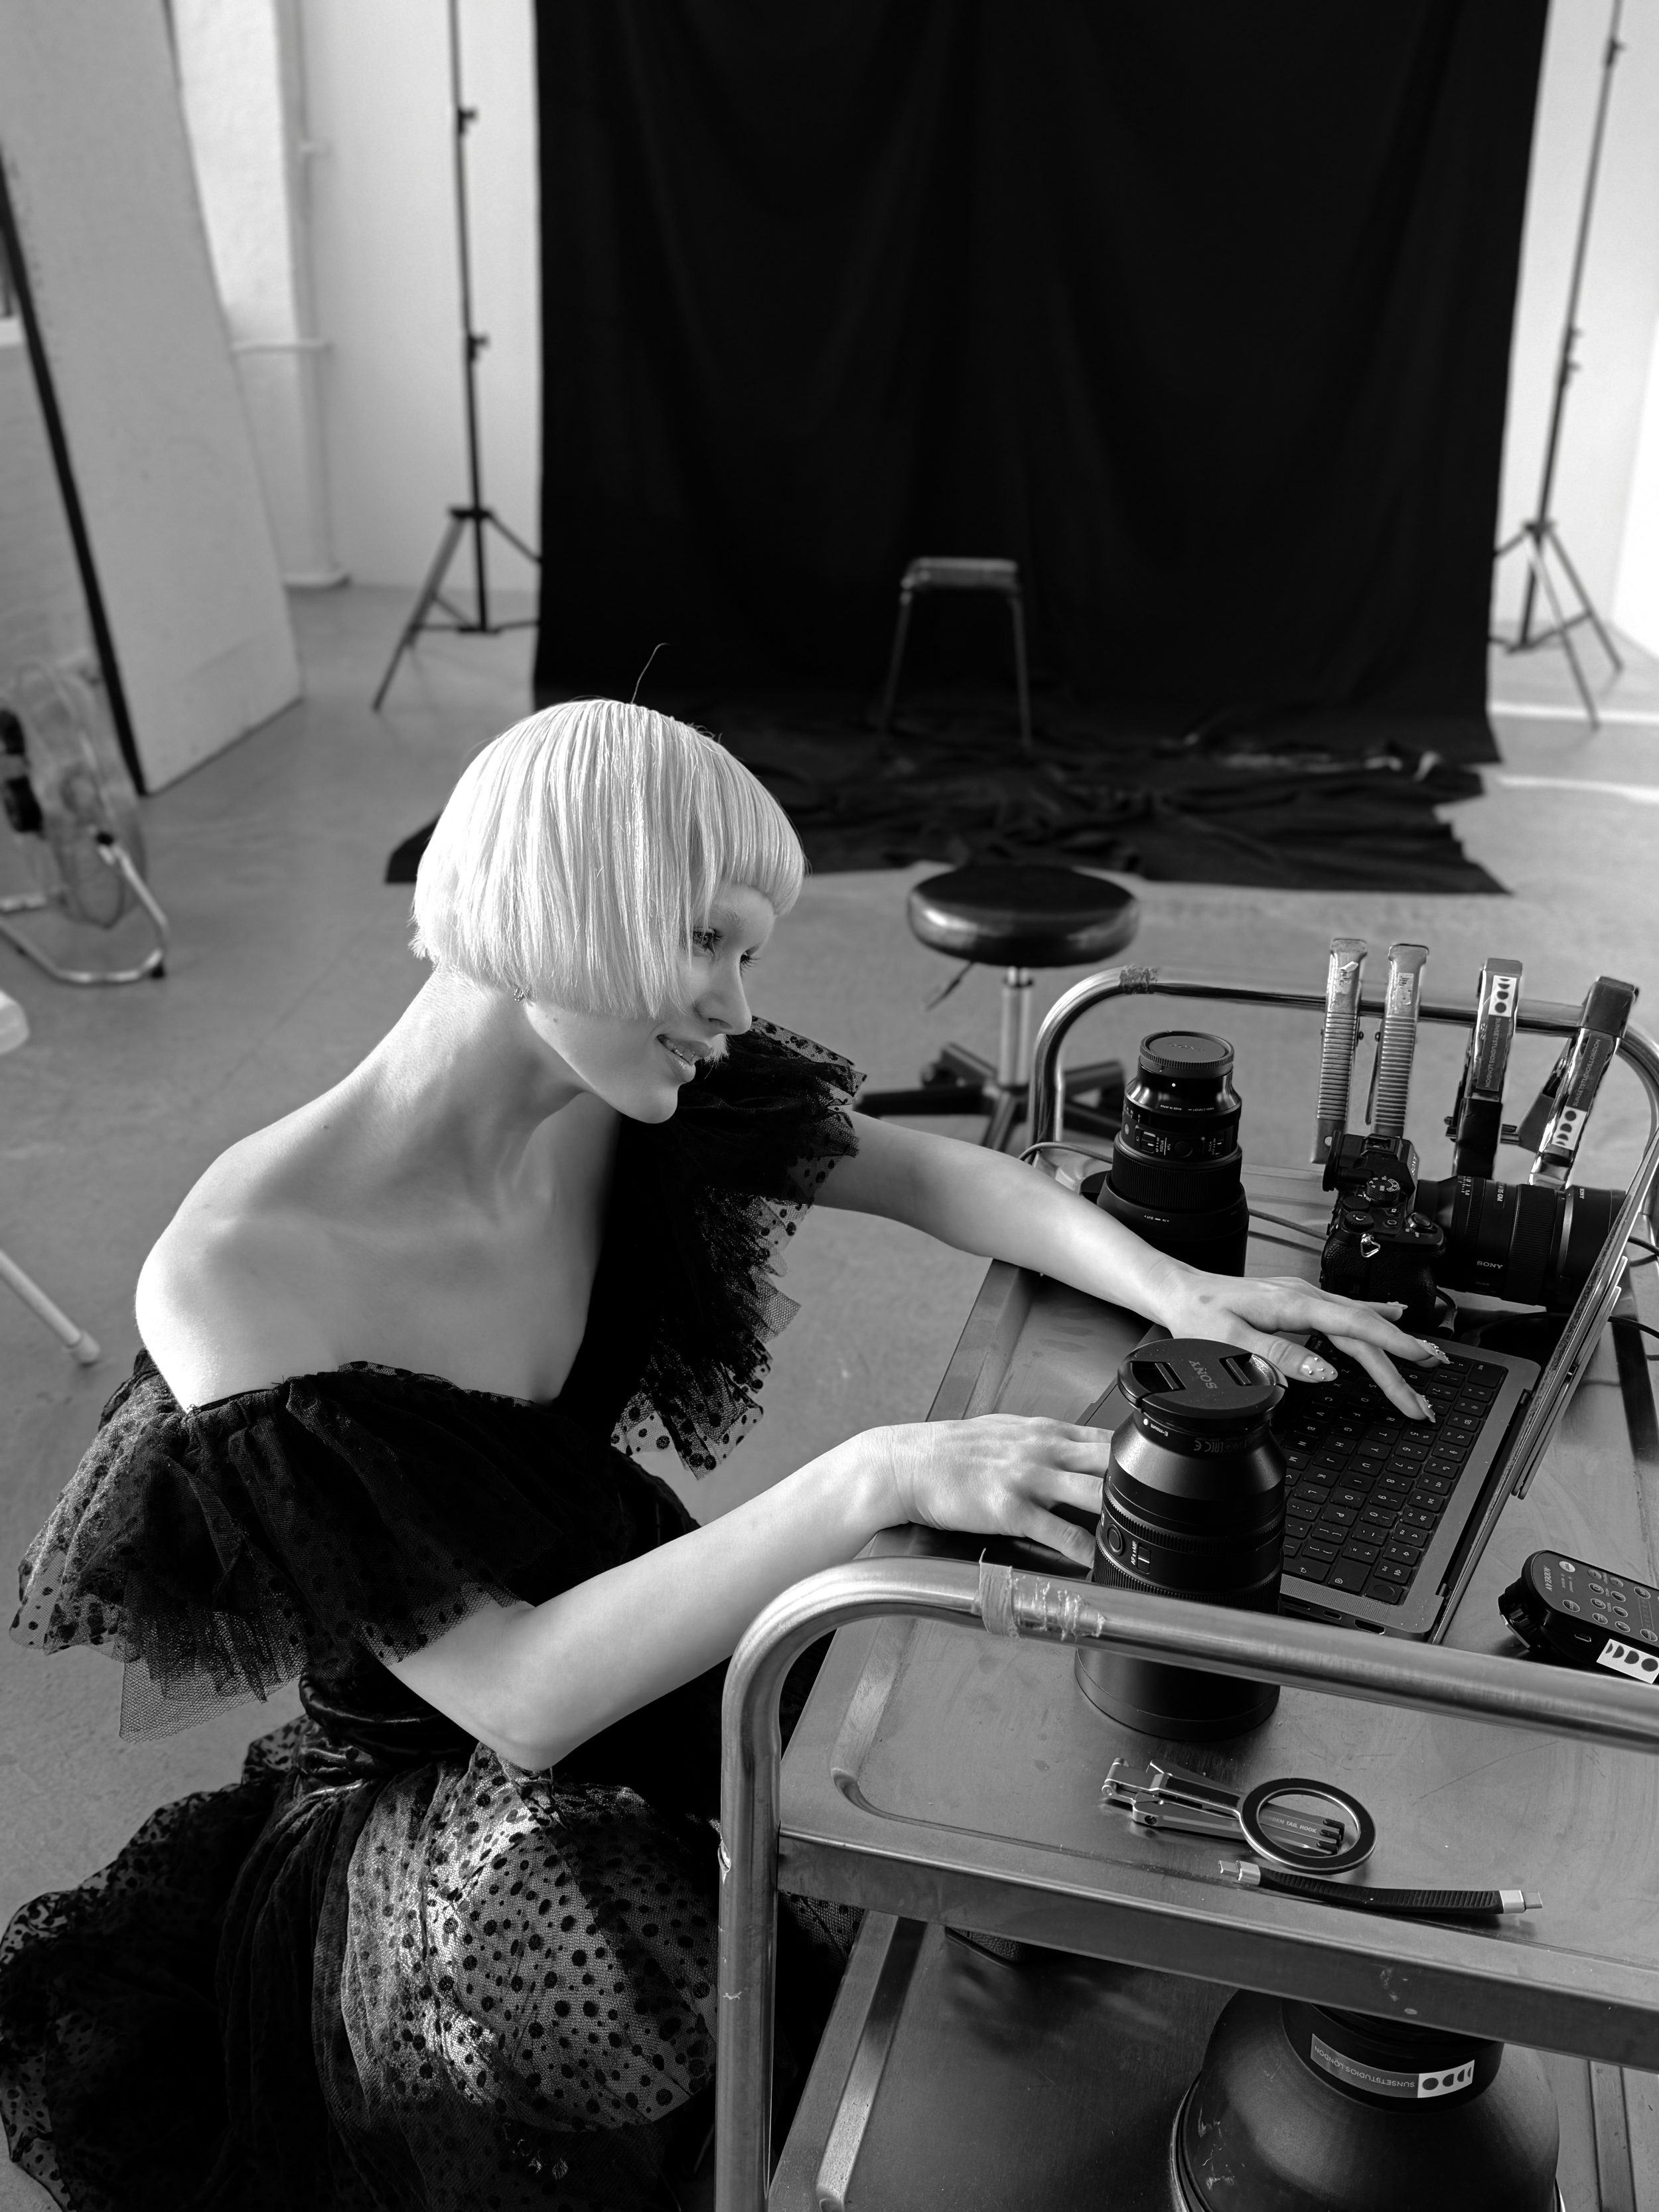
It was time to break. Saida is a pro and could shoot through, but I like to ensure we both get time to rest. It’s also nice to have time to chat about non photography things and maybe look at some of the images we have taken. I always shoot tethered and like the model to be able to rate images there and then. I consider it the right thing to do, but it is also partly selfish as I don’t want to edit images Saida might hate of herself.
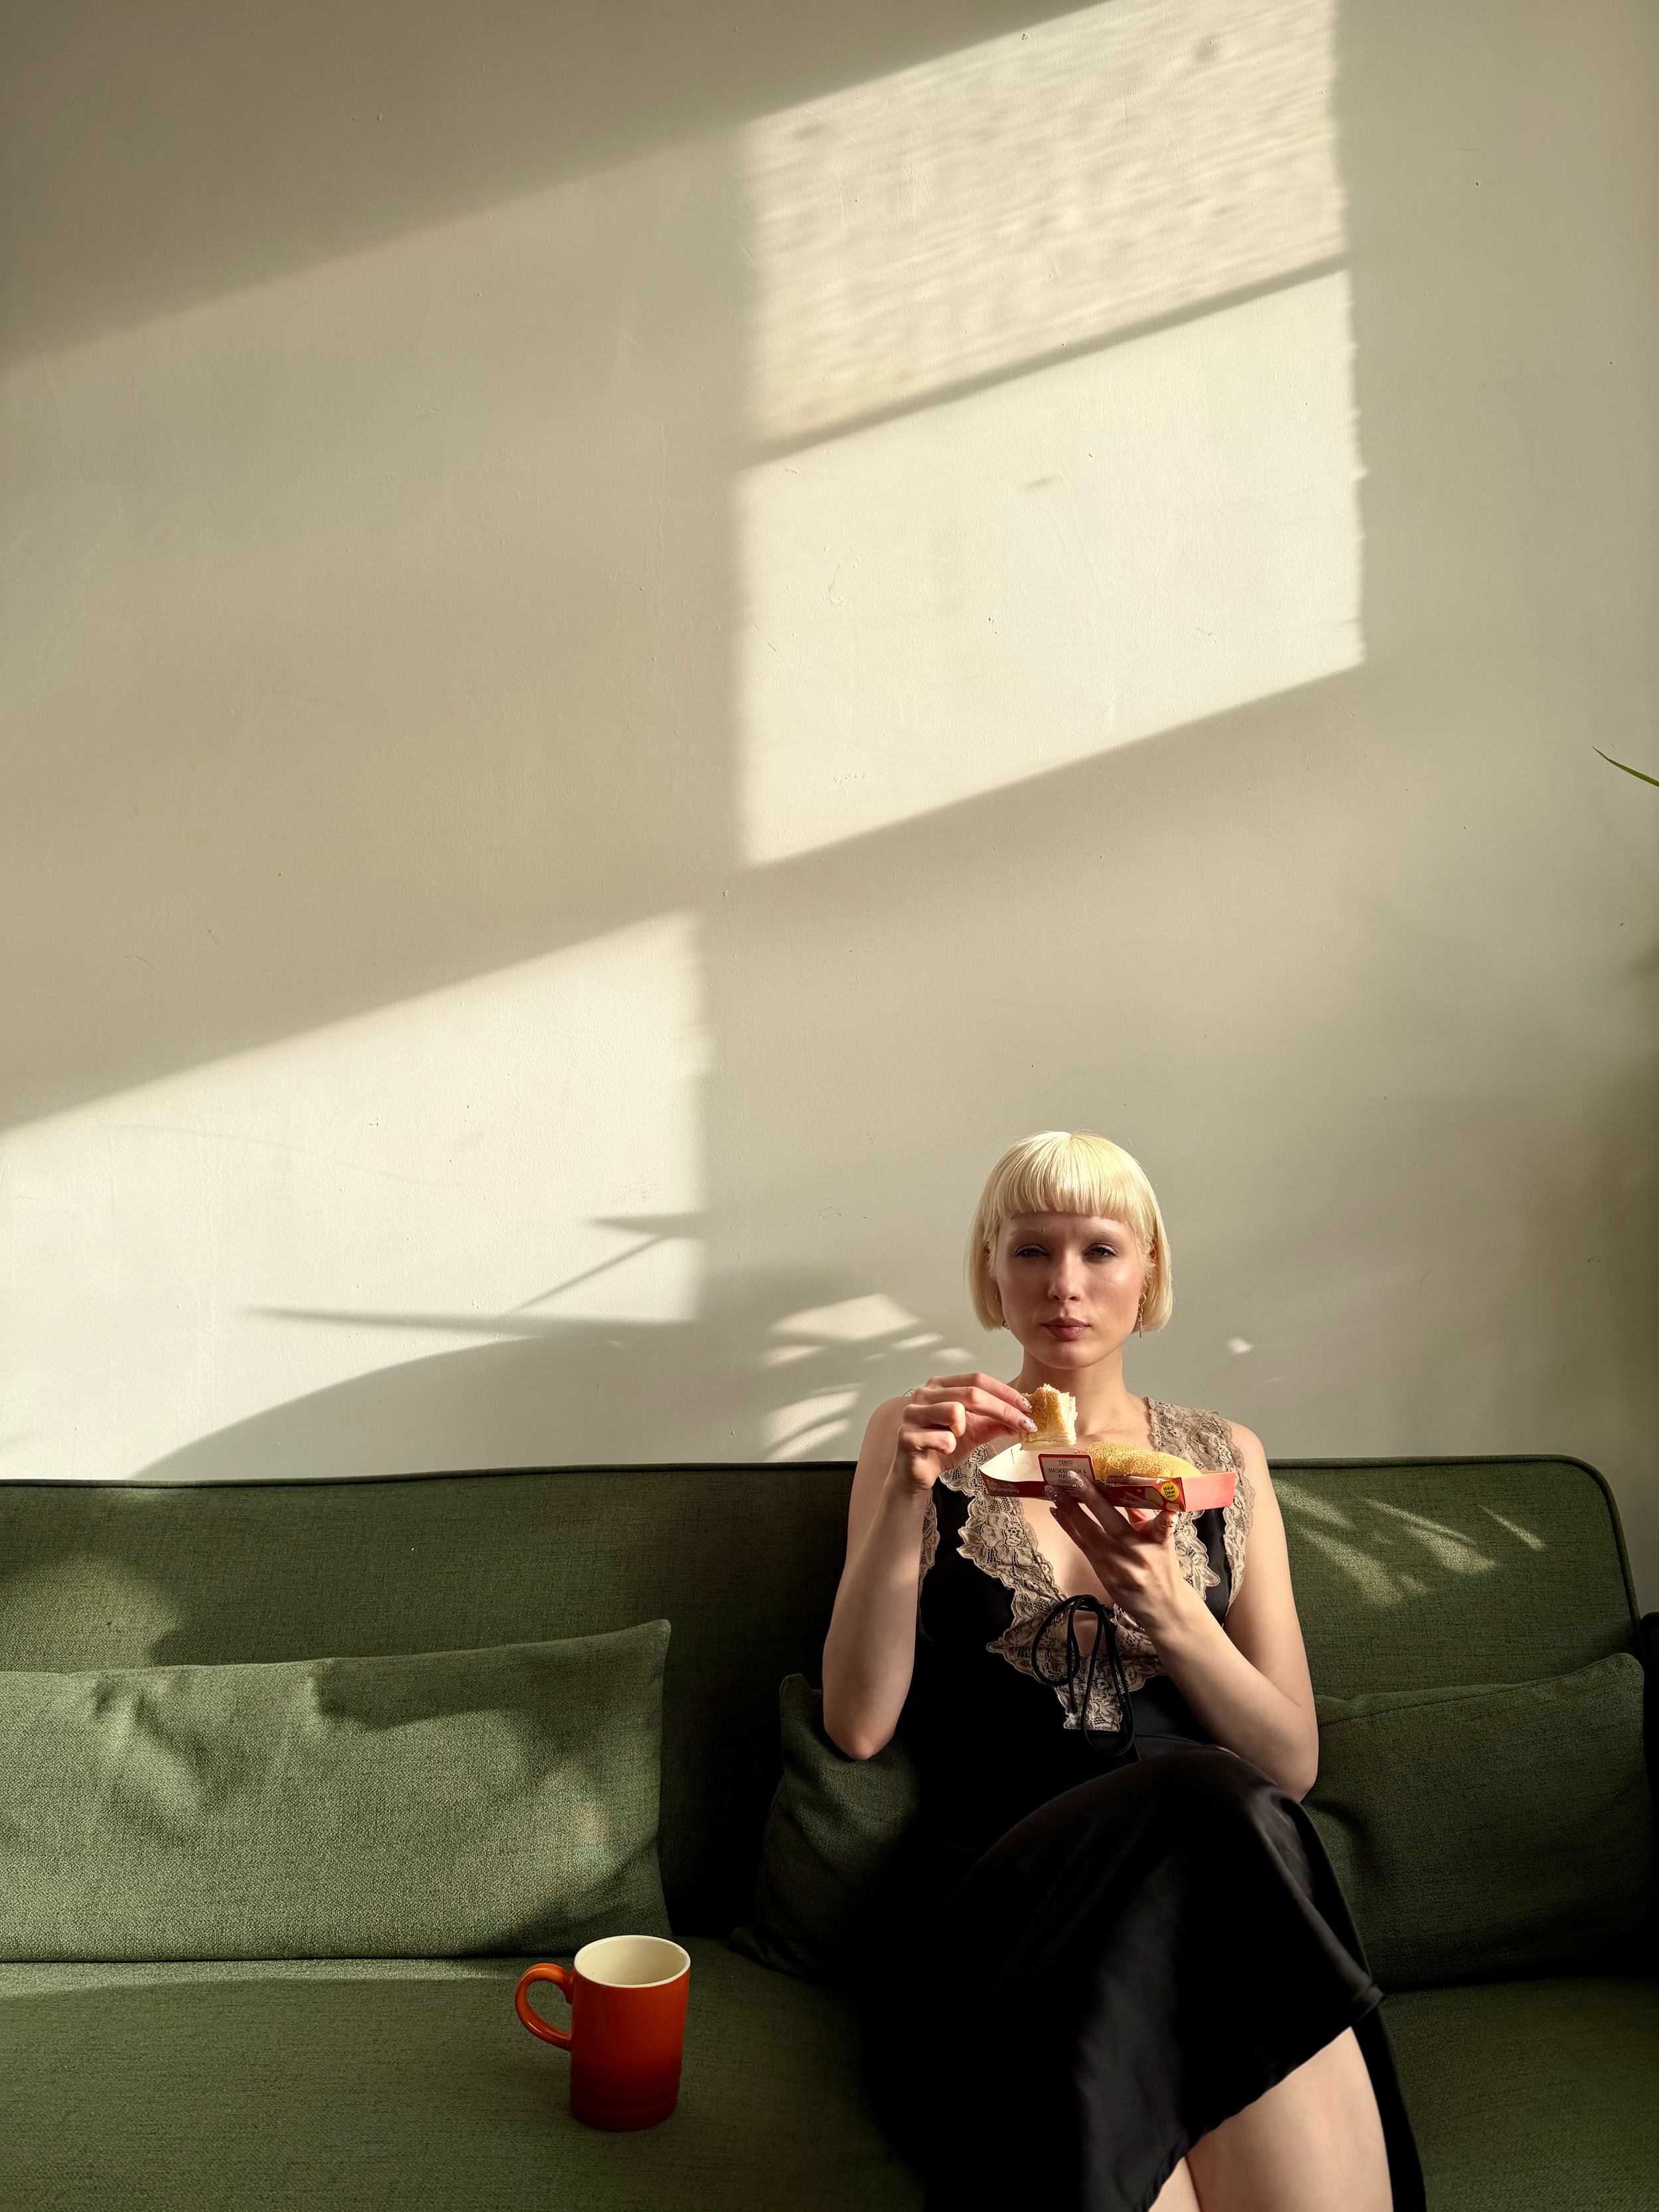
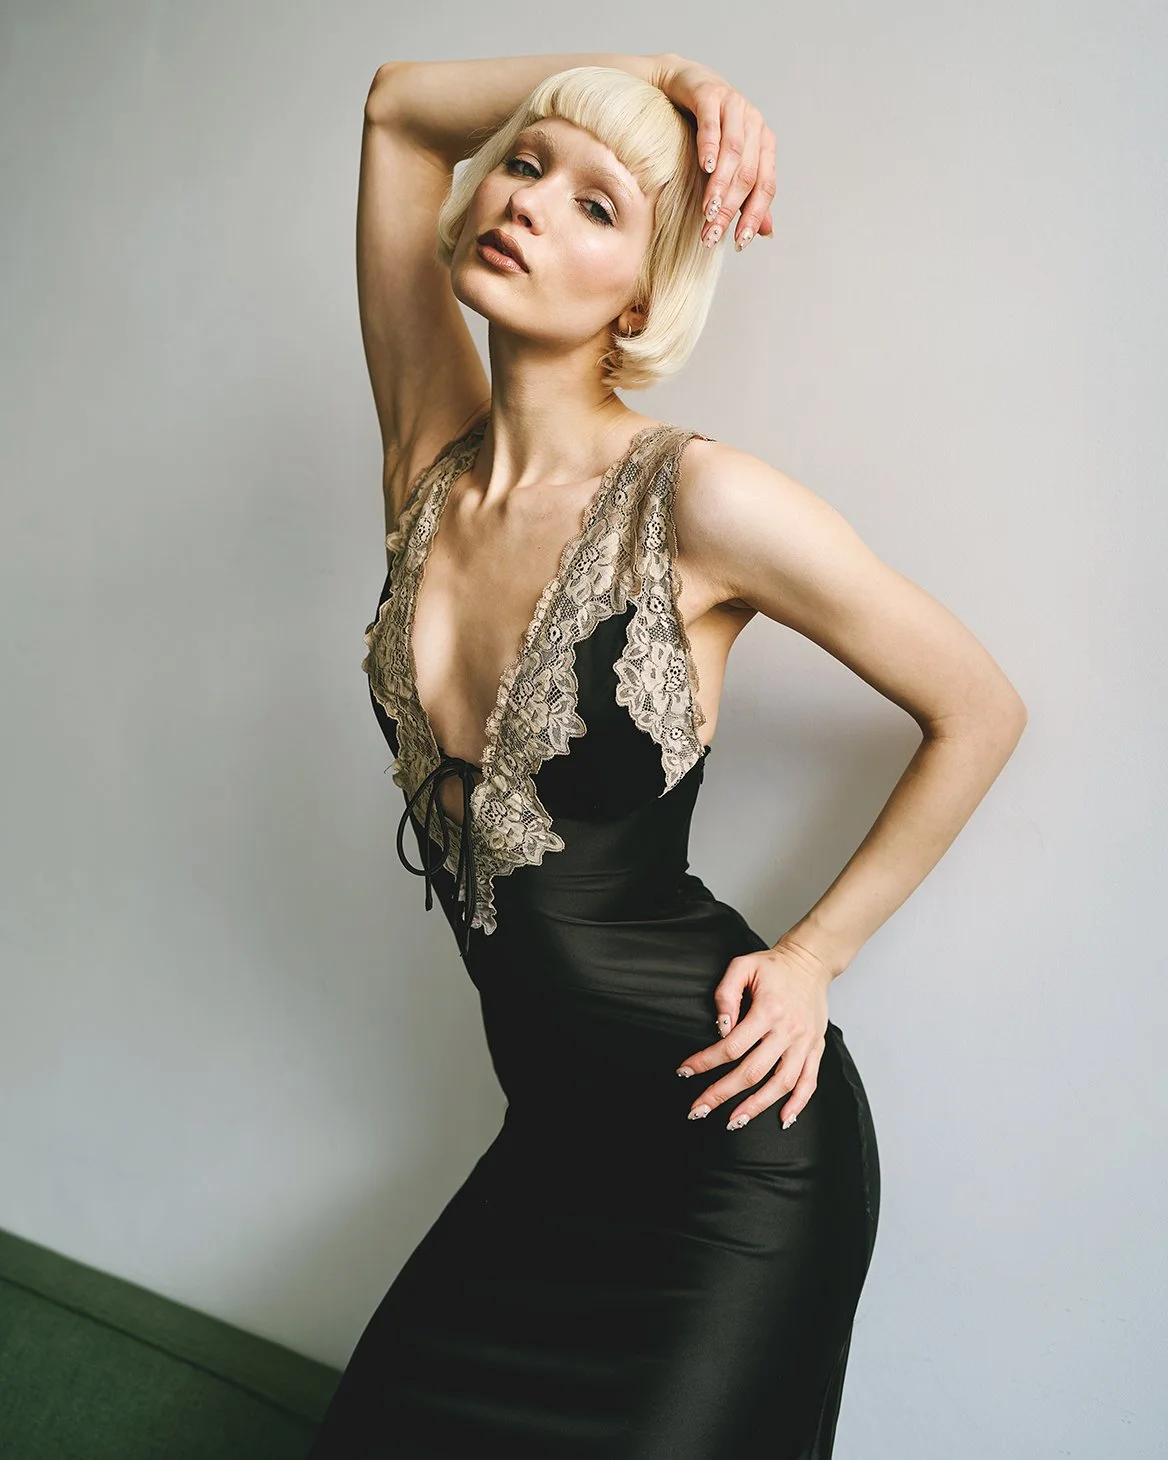
We sat down at the other end of the studio and chatted over lunch. Saida was still in her black dress sitting on a green sofa. I was sat opposite, trying to focus on my sandwich, but also very distracted by her composition in the much softer light. I always love seeing the real person, some of my favourite models, ones with a massive following, are also happy to reveal their goofy side. I’m sure that is true of Saida too, but in that moment, she was somehow eating a BLT sandwich and looking incredibly elegant with it.
I waited until she was done and then proposed that we use the very last of the daylight right here. Something that required her to stand on the sofa to truly leverage the light above her. These were not planned and they may not be the images we’d frame, but they were very much part of our story and editorially speaking they had their place at the table.
Takeaway: Take time out to relax and chat. But that change of context can be just as inspiring.
One of many portraits of Saida that I took on the day.
#7 Working with Hair, Makeup and Assistants
A long time ago I used to assist some truly great photographers. The studio would be busy with various skills but I always admired the stylists and hair and make-up artists. It’s only when you pull back and your shoot is just you and a model that you appreciate the void that they filled. I’m lucky that most models I have worked with are happy doing their make up and Saida was something of an expert. But I have joked countless times whilst standing at the top of a ladder that it would be nice to have an assistant now and then.
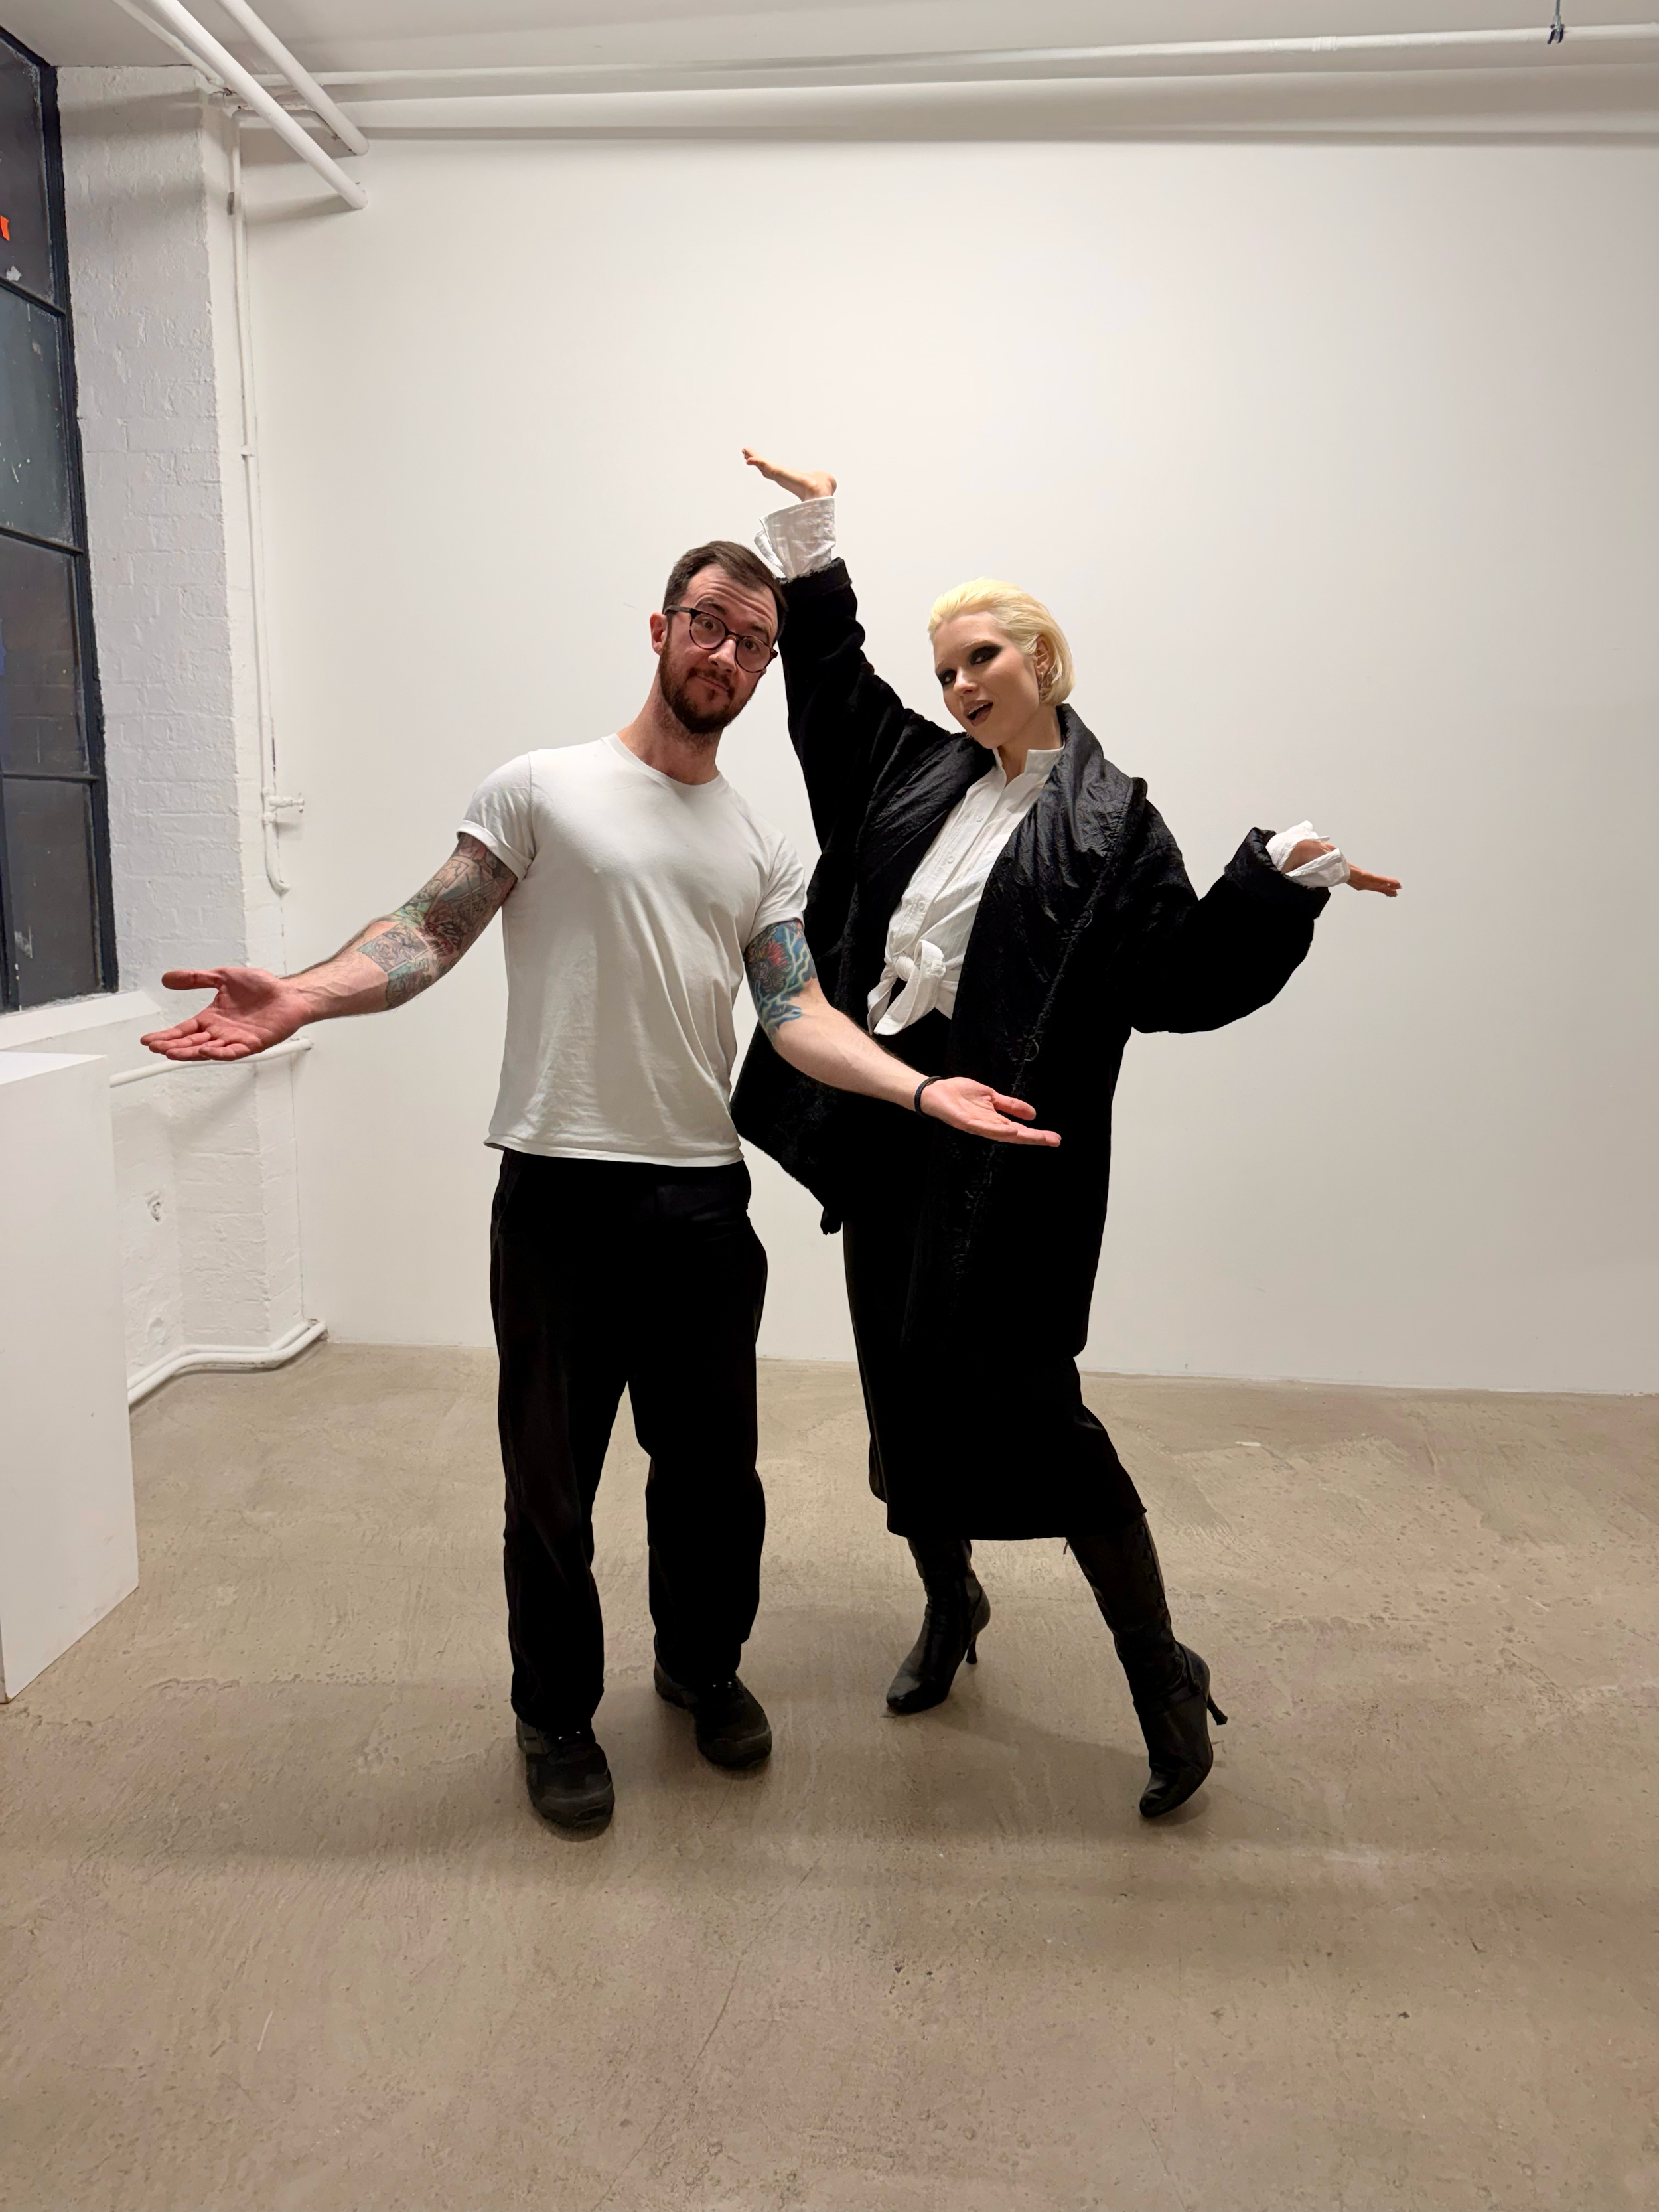
A few days back I had pinged my friend Josh. He lived near this studio and used it often himself. We had chatted previously about catching up again over a beer and I suggested he could meet up with me after this shoot. That soon escalated into him offering to assist me after his shoot on the other side of town. By the time Saida and I finished our post lunch shoot Josh knocked on the studio door.
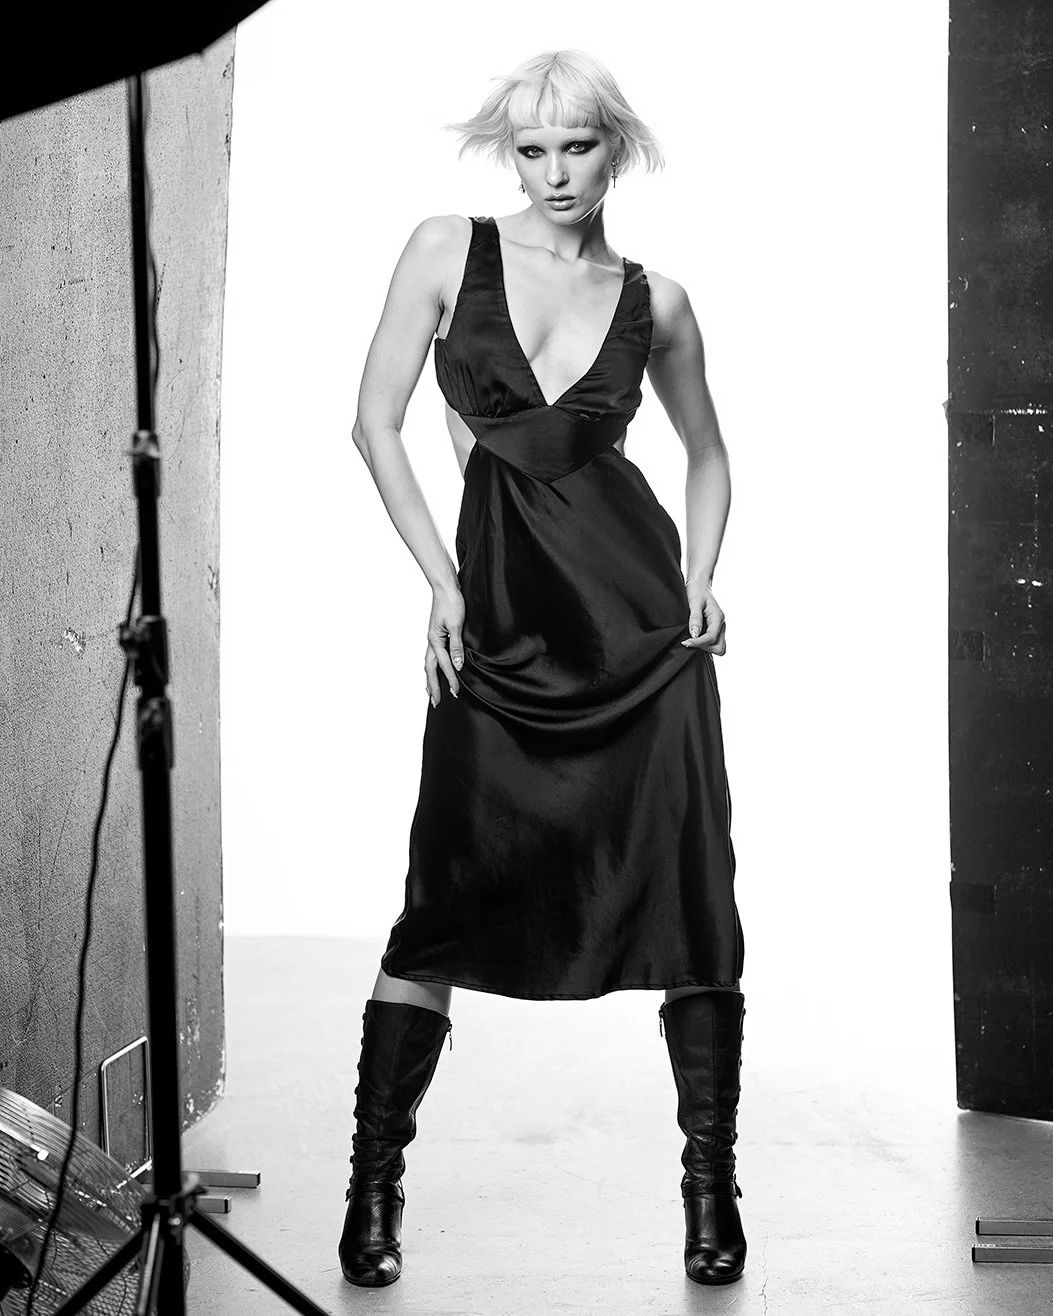
The daylight had gone, I knew we’d need to switch to flash so I had saved some strong makeup looks for the later part of the shoot. It's best to build up the make up, start simple and layer up. Saida knew the concept I had in mind and went into the makeup room to get ready whilst Josh and I built a corridor of poly boards and pointed a couple of Profoto monoheads at the back wall. The final light was put inside a large modifier above the entrance to our tunnel. The scene was set for some high key fashion images, something that I suspected would suit Saida perfectly. This example image shows the set up, but is worthy of being in the sequence because of her strength in it.
Takeaway: Never underestimate the power of a good make up artist or assistant.
Click the video to see how this set came together, from BTS to final edits and all the way through to the prints. Note: uploading the video lost some of the detail so the stills appear brighter than they really are.
#8 Embrace spontaneity
The shoot had ended, Saida was back in the dressing room whilst Josh and I squared away the poly board maze we had created. I had enjoyed a varied shoot with Saida and it had been a true luxury to have Josh join us. Before we finished, I had used the previous set up to do another more beauty inspired set (fun fact, I just found those images, unedited, whilst sorting out this post).
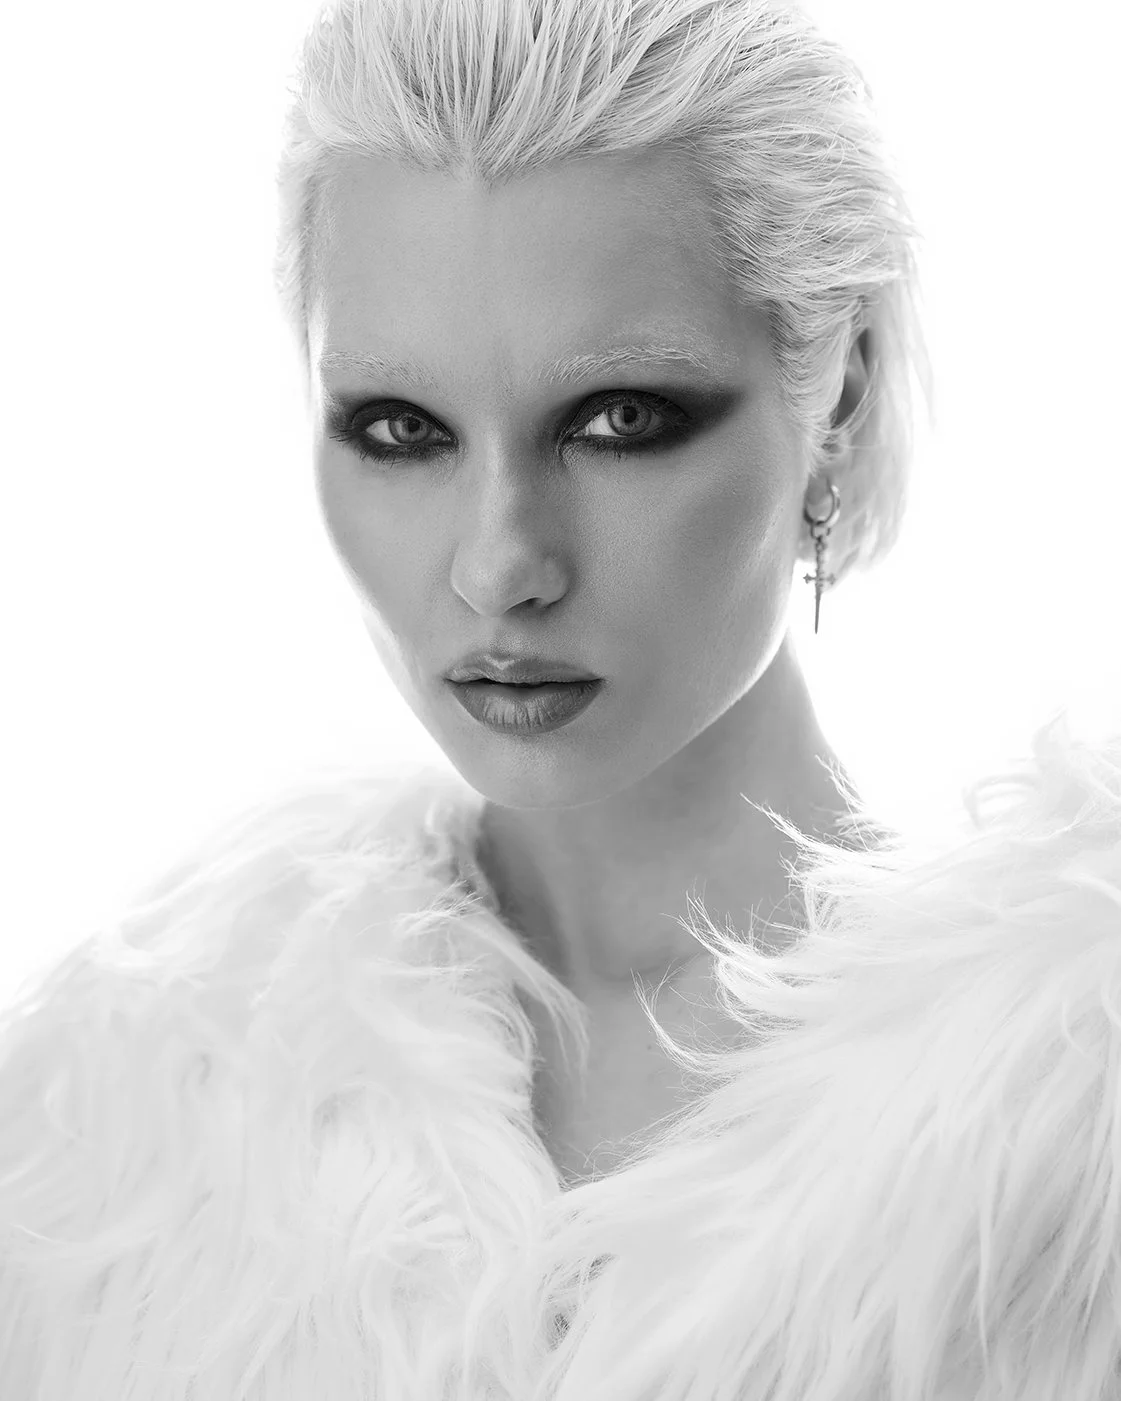
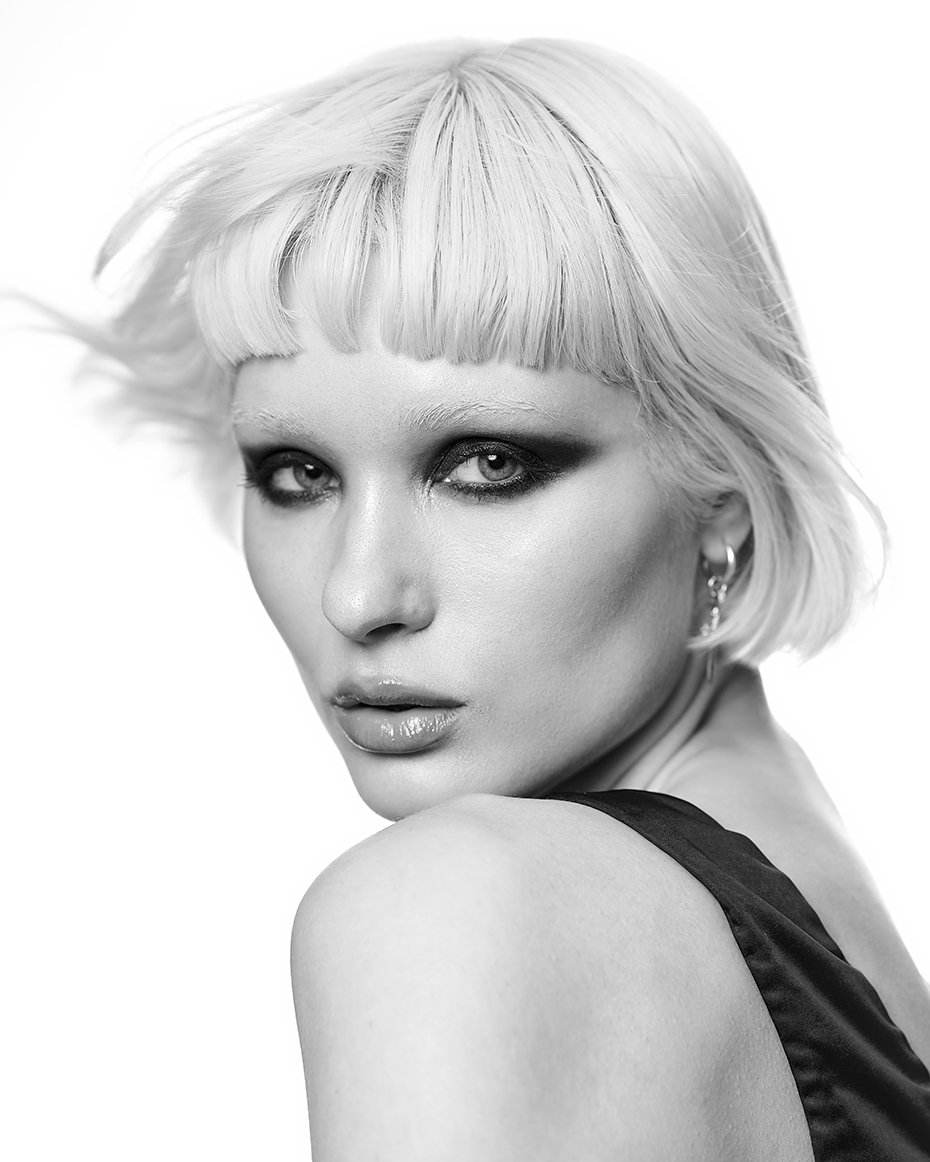
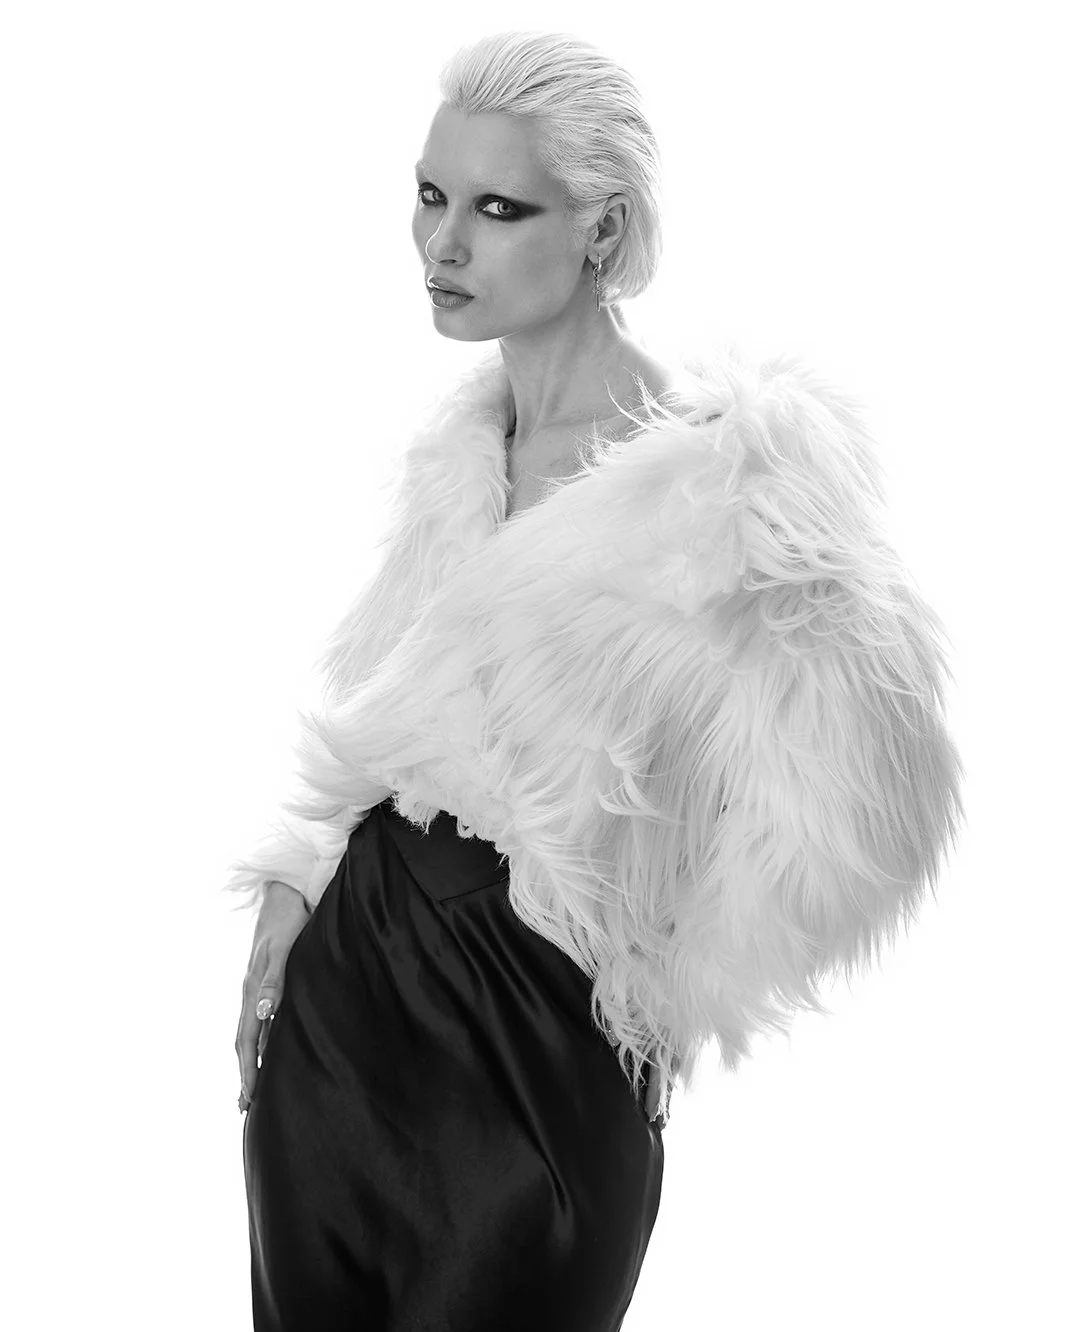
Saida burst into the room, brandishing a white faux fur top I had brought. “We forgot to use this!” she announced. I had been inspired by Saida’s fair hair and liked the idea of a very contrasty look with heavy make up and slicked back hair. We had almost used up the time. But in that moment it seemed worthy of one last hurrah. Saida went back into the makeup room, checked her make up and made her hair wet in the sink. Time was short, we had maybe fifteen minutes before we had to leave the studio so she kept the black dress on.
The last set was part planned and part spontaneous but only happened because we all trusted each other, we knew we could make it work and the images spoke for themselves. They were the contrasty look I had wanted and they also contrasted the previous sets nicely. It was one of those shoots where everything aligned, preparation, gut feel and trust. That evening I went home and sent Josh and Saida a DM saying that they reminded me of Brigitte Nielsen in Beverly Hills Cop 2. Me revealing my age, but thankfully they got the reference.
Takeaway: if your shoot is fluid and built on trust you might be surprised by those bonus moments.
#9 Editing and printing
I find I enjoy editing my photos as much as I do taking them. I stick some music on and enjoy scrolling through the images we created. When in a studio, I shoot tethered to Capture One, I use this for organising my photos, rating them, but also the RAW editing step of my post processing. I group by outfit or look and then sort them so the rated images come up first. I always do a full review myself, it’s nice to see how my choices align with the ones the model selected.
I then move my favourite images into Photoshop for any retouching and fine tuning. If the set is going to be a black and white image, I often do the B&W conversion in Capture one, unless I plan to edit both colour and B&W in which case I will use Infinite Color Suite for the colour processing. I tend to be quite honest with my editing, I don’t like overly processed images and like to keep as close to the ‘as shot’ image as possible.
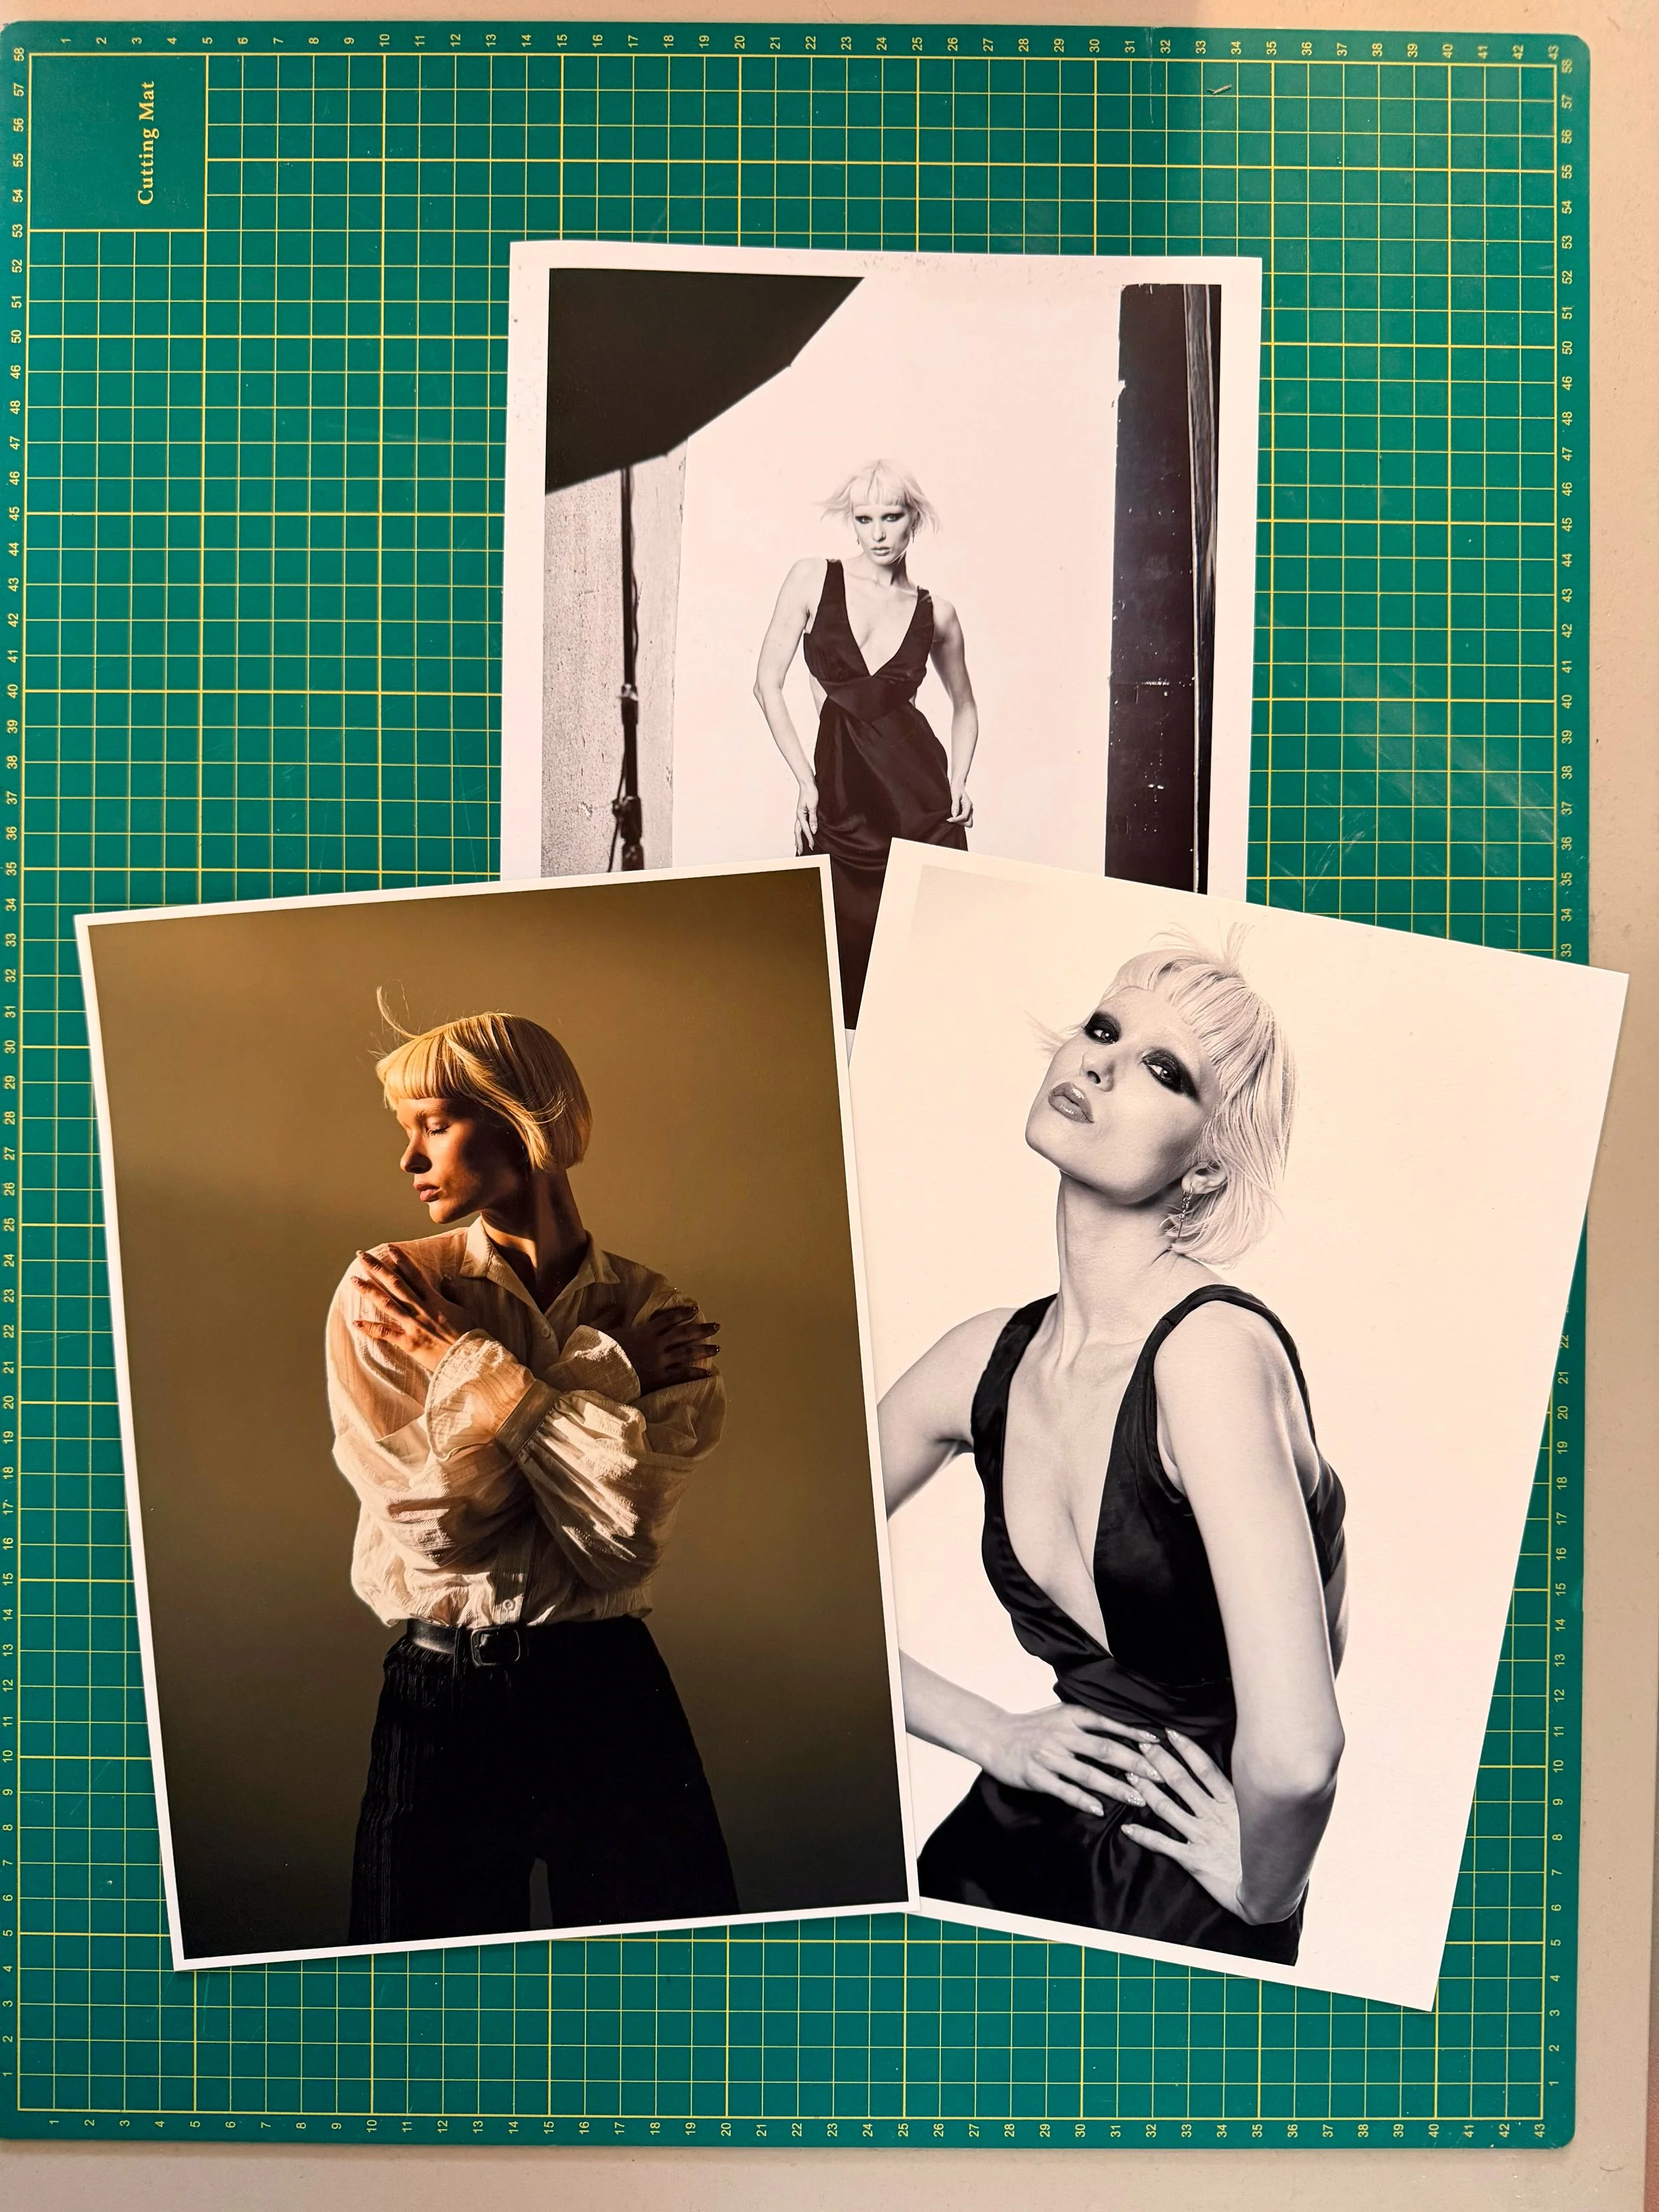
Next comes the best bit, printing the images. I always save out a print ready version of each image, this allows me to select my favourite ones to print. I’m not a fan of how digital photography has somehow left the tactile nature of photography behind so I like to hold on to the craft as I knew it by printing my favourite images. I keep a selection of paper stocks that I like and see which one fits. I start with an A4 print and work up to bigger sizes (up to A2) if I think the image warrants it. I talk about the printer I use and my workflow in a separate post. Link below.
Takeaway: Go into the shoot and aim to take photos that are printworthy and you might find you shoot differently.
Summary
Every shoot is different, but the principles stay the same: know who you’re working with, understand your light, stay flexible and don’t be afraid to follow a moment when it appears. Do that, and you’ll rarely leave without something you want to keep in your portfolio, or in my case print. The BTS images below give you another take on the same story.
Big thanks to Saida Mickeviciute and my friend Josh Showell.
If you enjoyed this post, you might like some of my other tutorials:
The perfect hard light set up for studio portraits
How to Take Portraits That Capture the Soul
10 Lessons I Learned about Giclée Printing